
Home roasting is one of the most rewarding skills a coffee lover can develop, but inconsistency can make it feel like a guessing game. One batch tastes bright and complex, the next comes out flat or grassy, and you’re left wondering what changed. The good news is that best practices like consistent batch size and precise profile control can close that gap fast. This guide walks you through six practical, expert-backed strategies to help you roast with more confidence, more repeatability, and a lot more flavor in every cup.
Table of Contents
- Set a consistent batch size for repeatable results
- Master the Rate of Rise (RoR) for smooth development
- Fine-tune your roast profile instead of fixating on roast level
- Monitor moisture and understand first crack for defect-free roasts
- Avoid common home roasting mistakes for cleaner cups
- Log every roast and taste test for continuous improvement
- Dial in your next roast with Adira Coffee
- Frequently asked questions
Key Takeaways
| Point | Details |
|---|---|
| Keep batch size steady | Roasting equal bean weights improves repeatability and results. |
| Monitor Rate of Rise | A smooth, declining temperature rise unlocks better flavors and avoids defects. |
| Prioritize roast profiles | Shaping the development curve makes a bigger taste impact than just color or level. |
| Document and taste test | Consistent record-keeping and side-by-side cupping speed up home roasting mastery. |
Set a consistent batch size for repeatable results
Batch size is simply the weight of green coffee you load into your roaster for a single session. It sounds basic, but it’s one of the most overlooked variables in home roasting. Change your batch size by even 20 grams and you change how heat moves through the beans, how airflow behaves, and how quickly the roast develops. The result? A profile that worked perfectly last week suddenly produces something completely different.
Here’s how batch size affects your roast:
- Heat transfer changes because more beans absorb more energy, slowing temperature rise.
- Airflow dynamics shift, which can cause uneven roasting or chaff buildup.
- Development time compresses or stretches, altering sweetness and acidity.
- Drum or chamber load affects bean movement and contact with heat surfaces.
For small batch roasting at home, staying within a tight weight range, say within 5 grams of your target, gives you a reliable baseline to build on. Once you nail a profile at a fixed batch size, replicating it becomes straightforward.
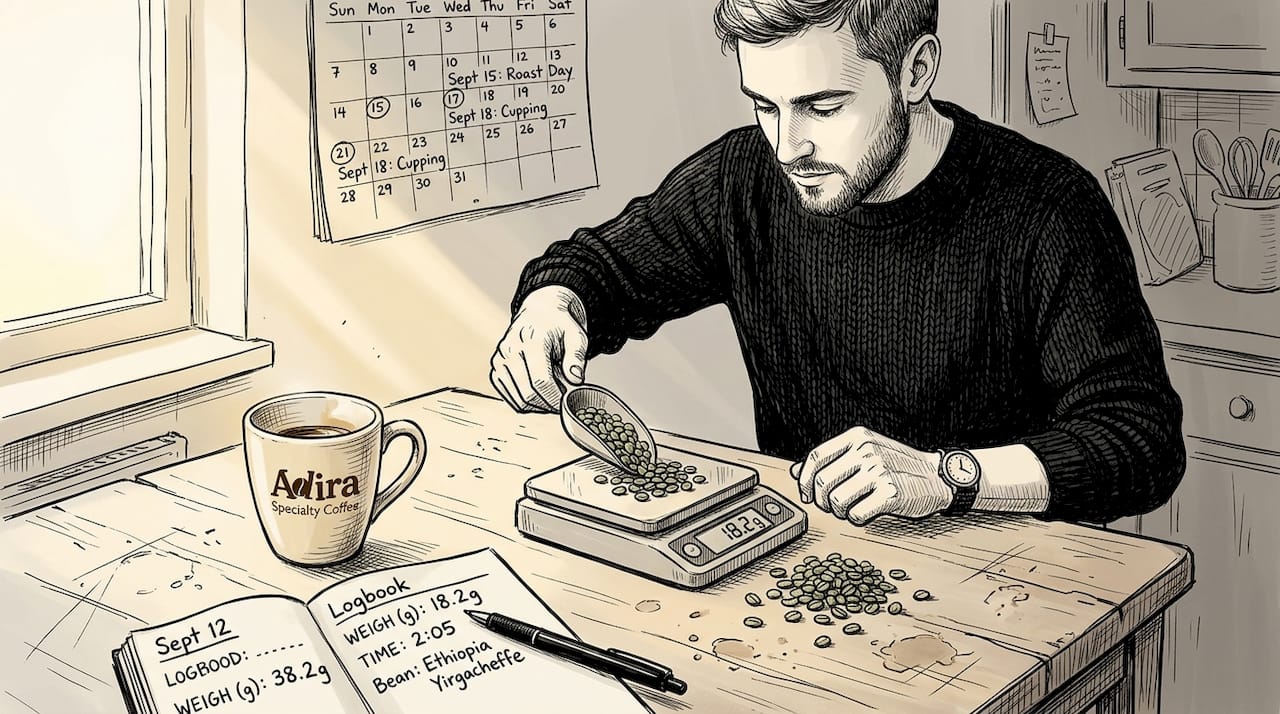
Pro Tip: Weigh your green beans on a kitchen scale before every single roast. Log the weight alongside your temperature curve and end result. Over time, this data becomes your personal roasting playbook.
When you’re also choosing the right beans for each session, matching bean density and processing method to your batch size makes an even bigger difference in consistency.
Master the Rate of Rise (RoR) for smooth development
With batch size locked in, the next variable to control is how quickly your roast temperature climbs. Rate of Rise, or RoR, measures how many degrees your bean temperature increases per minute. A smooth, gradually declining RoR is the hallmark of a well-developed roast.
When RoR goes wrong, your cup pays the price:
- A crash (RoR drops suddenly to near zero) produces baked, flat, or bready flavors with no brightness.
- A flick (RoR rises sharply after declining) causes scorching or harsh, astringent notes.
- A spike early in the roast can create a scorched exterior with an underdeveloped interior.
- Stalling just before or after first crack leads to grassy, sour, or papery cups.
The goal is a smooth RoR decline from charge through first crack and into development, with no sudden jumps or drops. Think of it like driving on a highway: gradual deceleration is comfortable, but slamming the brakes causes problems.
Pro Tip: You don’t need expensive software to track RoR. A simple notebook where you record bean temperature every 60 seconds gives you enough data to spot trends. Free apps like Artisan (for compatible roasters) can automate this entirely.
Understanding your roast profile basics makes RoR management much easier because you’ll know what a healthy curve looks like before you even start.
Fine-tune your roast profile instead of fixating on roast level
Managing RoR leads naturally to thinking about your entire roast profile, not just where you stop the roast. Many home roasters obsess over roast level (light, medium, dark) when the real flavor control comes from the profile: the full map of temperature changes and timing from charge to drop.
“Profiles are more important than roast levels for controlling flavor. Two roasts that end at the same color can taste completely different depending on how they got there.”
Here’s a simple comparison to illustrate the point:
| Profile style | Development time | Flavor result |
|---|---|---|
| Fast and hot | Short (60-90 sec) | Bright, acidic, sometimes thin |
| Slow and steady | Medium (2-3 min) | Balanced, sweet, complex |
| Extended development | Long (3+ min) | Full body, lower acidity, roasty |
| Crash and stall | Irregular | Flat, baked, no clarity |
The roast profile vs. roast level distinction is one of the most important mindset shifts you can make as a home roaster. Once you stop chasing a color and start chasing a curve, your flavor targeting becomes far more precise. If you’re aiming for a medium roast flavor with balanced sweetness and brightness, the profile is what gets you there, not just the drop temperature.
Monitor moisture and understand first crack for defect-free roasts
With your profile mapped, the most critical moment in any roast is first crack. This is the audible popping sound that signals the beans are releasing steam and CO2 as cell walls break down. What you do in the 60 to 90 seconds after first crack defines the final flavor more than almost anything else.
Moisture-adjusted profiles and precision post-first crack are critical for quality, especially when working with beans from different origins that carry different moisture levels.
Here’s a simple walk-through for managing this stage:
- Check bean moisture visually before roasting. Dull, chalky green beans are drier and will roast faster. Vibrant, waxy green beans hold more moisture and need more time.
- Listen for first crack carefully. It sounds like popcorn popping, distinct and rhythmic.
- Note the time and temperature the moment first crack begins. This is your development start point.
- Maintain your RoR through development. Don’t cut heat aggressively or you’ll stall the roast.
- Drop the beans at your target development time, typically 15 to 25 percent of total roast time.
“Stalling after first crack is one of the most common defects in home roasting. Even a 30-second stall can flatten the entire flavor profile.”
Learning to understand first crack as a dynamic event rather than a fixed checkpoint gives you far more control over sweetness, body, and acidity.
Avoid common home roasting mistakes for cleaner cups
Even with great planning, small blunders can undo hard-earned improvements. Avoiding common defects is just as important as executing a good profile. Here are the most frequent mistakes home roasters make:
- Overfilling the roaster restricts airflow and causes uneven heat distribution.
- Skipping preheat means your beans hit a cold drum, leading to scorching on the outside before the inside develops.
- Ignoring airflow traps smoke and chaff, adding harsh, ashy notes to the cup.
- Rushing the cool-down by not cooling beans fast enough allows carryover roasting to push the roast darker than intended.
- Roasting stale green beans produces flat, lifeless cups no matter how good your profile is.
| Mistake | Simple fix |
|---|---|
| Overfilling | Stay at or below 80% of roaster capacity |
| Skipping preheat | Always preheat to charge temperature before loading beans |
| Poor airflow | Clean chaff collector after every roast |
| Slow cool-down | Use a colander and fan to drop bean temp within 4 minutes |
| Stale green beans | Source fresh green beans and store in a cool, dry place |
If you’re roasting darker profiles, check out dark roast mistakes that are specific to that roast range, since the margin for error narrows significantly as you push past second crack.
Log every roast and taste test for continuous improvement
The final tip is the one that compounds all the others. Consistent batch logging and profile tracking are what separate roasters who plateau from those who keep improving. Without records, every roast starts from scratch.
A simple roast log should include: date, green bean origin and weight, charge temperature, first crack time and temperature, drop time and temperature, and tasting notes from the next day’s brew. That’s it. Even a basic notebook works.
For tasting, try this numbered approach:
- Brew two versions of the same bean roasted at different profiles, side by side.
- Use the same brew method for both so the only variable is the roast.
- Taste blind if possible, having someone else pour so you don’t know which is which.
- Note specific flavors, not just “good” or “bad.” Write down acidity, sweetness, body, and finish.
- Compare your notes to your roast log and identify what profile change produced what flavor shift.
This process, repeated over a few months, helps you learn from each roast in a structured way that builds real skill rather than just experience.
Dial in your next roast with Adira Coffee
All of these tips work best when you start with beans worth roasting. The quality of your green coffee sets the ceiling for what any profile can achieve.
At Adira Coffee, we source premium coffee beans from around 50 farms across Colombia, Ethiopia, Costa Rica, Guatemala, Brazil, and Sumatra, all chosen for their distinct flavor potential and traceability. If you want a great starting point for practicing your profiles, our Ethiopia Natural beans offer a wide flavor range that responds beautifully to different development times. Explore roasting guides, origin stories, and curated selections at Adira Coffee to keep building on what you’ve learned here.
Frequently asked questions
What is the best temperature to roast coffee at home?
Most home roasters aim for 350 to 410°F, with temperature adjustments based on bean characteristics like density and moisture content. Denser beans generally need more heat to develop evenly.
How can I tell if my coffee beans are underdeveloped or baked?
Underdeveloped beans taste grassy or sharply sour, while baked beans produce flat or bready flavors with no brightness or sweetness. Both defects point to RoR problems during the roast.
Do I need special equipment to master home coffee roasting?
You can start with basic tools, but tracking and temperature control improve consistency dramatically. A kitchen scale, a thermometer, and a simple notebook are enough to get started.
Does the type of coffee bean matter for home roasting?
Absolutely. Bean origin, density, and processing method all influence how the bean responds to heat, how fast it develops, and what flavors emerge at each roast stage.