
TL;DR:
- Mastering filter coffee workflow ensures consistent, high-quality brews by focusing on proper equipment, technique, and observation. Adjustments like grind size, water temperature, and brewing time are essential for optimizing flavor based on bean freshness and roast level. Careful attention to each step, including blooming and drawdown, transforms routine brewing into a precise and satisfying process.
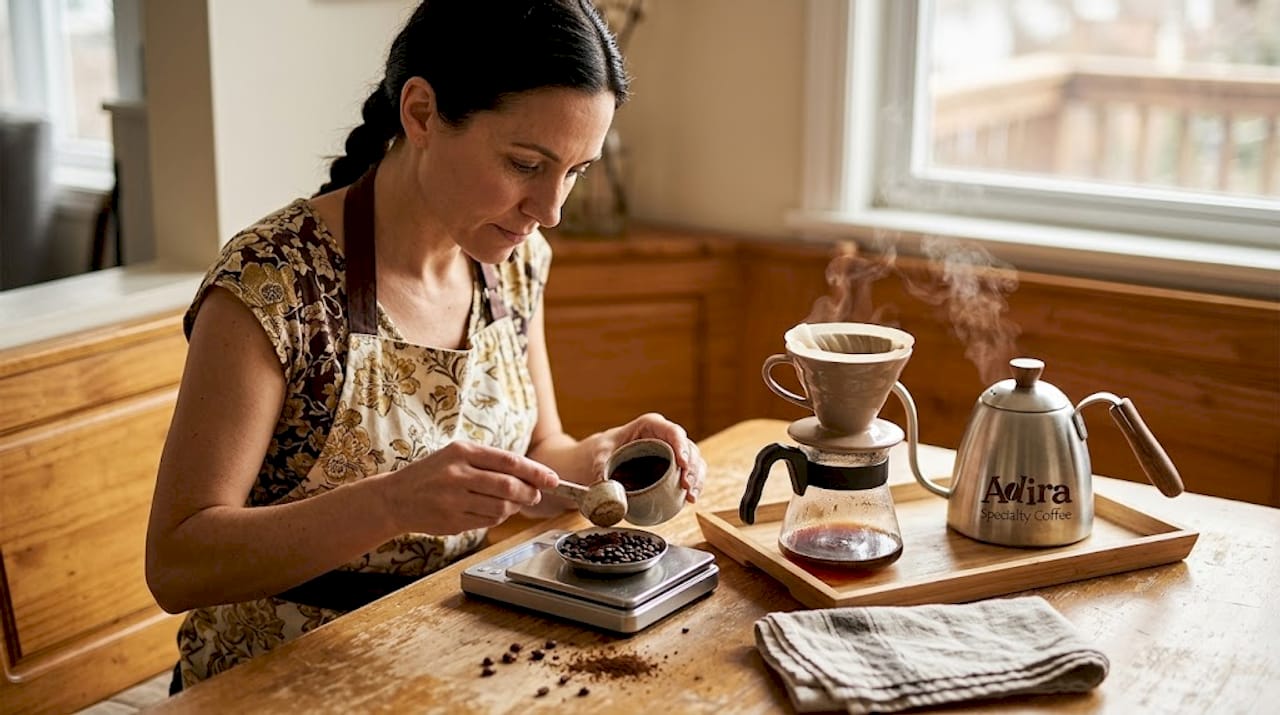
You buy freshly roasted specialty beans, you follow a recipe you found online, and yet your cup still falls short of what a good café produces. The gap is almost never the beans. It’s the workflow. Filter coffee rewards precision: the right gear, the right technique, and an understanding of why each step matters. This guide walks you through everything from setup to troubleshooting so you can brew consistently excellent filter coffee at home, every single time.
Table of Contents
- What you need for an optimal filter coffee setup
- Step-by-step filter coffee workflow for repeatable results
- Dialing in: adjusting your workflow for your beans and taste
- Common mistakes and how to troubleshoot your cup
- What most home baristas get wrong about filter coffee workflow
- Step up your workflow with premium specialty coffee
- Frequently asked questions
Key Takeaways
| Point | Details |
|---|---|
| Right tools matter | Consistent results start with a burr grinder, scale, filtered water, and a good dripper. |
| Master the workflow | Following a structured step-by-step process yields repeatable, café-quality filter coffee. |
| Tune for your beans | Adjust grind, water, and technique based on your coffee’s roast and flavor feedback. |
| Troubleshooting flavors | Decode off-flavors and adjust your process to fix sourness, bitterness, or muddiness. |
| Adapt over copy | Great filter coffee comes from tweaking and observing, not just imitating recipes. |
What you need for an optimal filter coffee setup
Before you can master the workflow, make sure you’re equipped for consistent results. Great filter coffee isn’t about owning the most expensive gear, but every tool on this list serves a specific, measurable purpose.
The essentials:
- Burr grinder — produces uniform particle size for even extraction. Blade grinders create inconsistent particles that muddy the flavor.
- Digital scale — weigh both coffee and water. Eyeballing is the enemy of repeatability.
- Gooseneck kettle — the narrow spout gives you pour control that a standard kettle simply cannot match.
- Filtered water — tap water minerals vary by region and directly affect taste and extraction chemistry.
- V60 or similar dripper — the Hario V60 is the industry benchmark for pour-over. Chemex and Kalita Wave are solid alternatives.
- Paper filters — rinsing them before brewing removes papery flavor and preheats your vessel.
- Thermometer or temperature-controlled kettle — filtered water at 92-96°C extracts the full flavor range without scorching the grounds. Plastic V60s are preferred over ceramic or glass for their superior heat retention.
One piece of gear that gets overlooked: the material of your dripper. Ceramic and glass V60s look beautiful, but they absorb and radiate heat. A plastic V60 keeps the brew temperature stable throughout the extraction window, which matters especially when you’re brewing light roasts that need every degree of heat they can get.
Pro Tip: Run your brewing guides lookup and set your kettle to exactly 93°C before grinding. By the time your coffee is ground and filter rinsed, the temperature will be perfect.
| Tool | Why it matters | Pro alternative |
|---|---|---|
| Burr grinder | Uniform grind size | Baratza Encore, 1Zpresso JX-Pro |
| Digital scale | Accurate coffee-to-water ratio | Any scale reading to 0.1g |
| Gooseneck kettle | Precise, controlled pours | Fellow Stagg, Hario Buono |
| V60 plastic dripper | Heat retention, consistent extraction | Kalita Wave, Origami dripper |
| Paper filters | Clarity, removes oils and fines | Bleached or natural both work |
| Filtered water | Clean taste, correct mineral profile | Brita, Clearly Filtered |
| Thermometer | Water temp precision | Built-in kettle thermometer |
Step-by-step filter coffee workflow for repeatable results
With your equipment ready, follow each step carefully to master consistency. This sequence is built around two well-established approaches from the filter coffee world.
1. Rinse the filter and preheat Place your paper filter in the dripper, set it over your server or cup on the scale, and pour hot water through the filter. This removes any paper taste and preheats both the dripper and vessel. Discard the rinse water, then tare the scale.
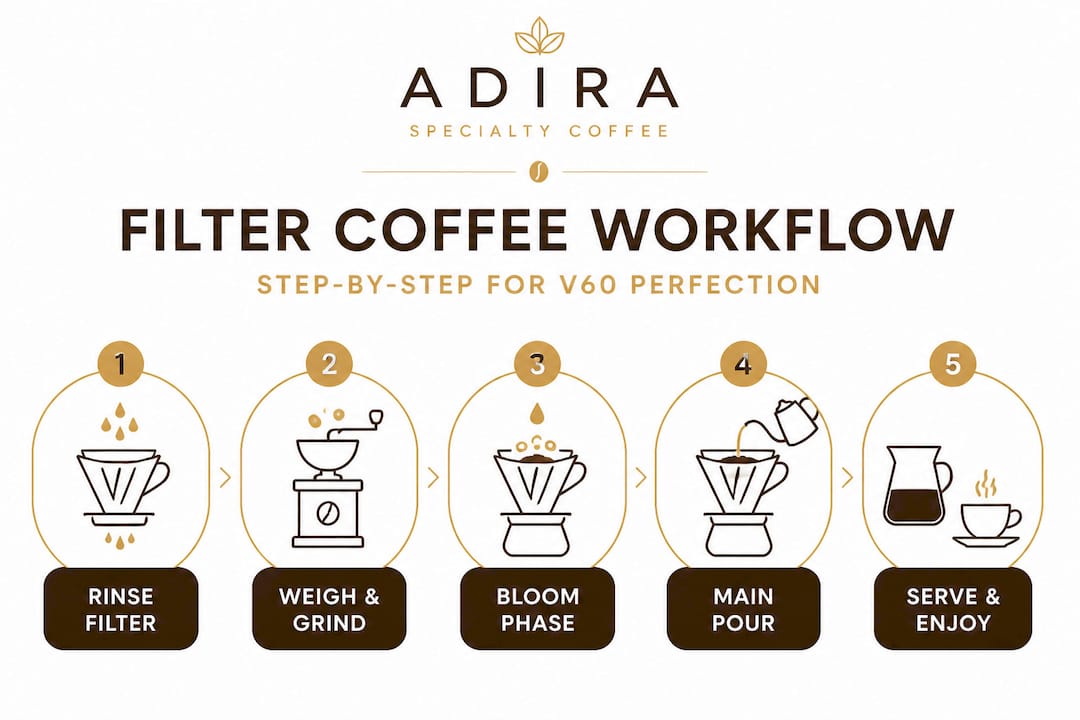
2. Dose your coffee and grind For a standard single cup using the Hoffmann V60 method, use 15g of coffee to 250g of water (a ratio of 1:16.6). Grind to a medium-fine consistency, similar to coarse table salt, at 93-96°C water temperature. Start the timer as you begin your first pour.
3. Bloom phase (0:00 to 0:45) Pour twice the weight of your coffee in water — so roughly 30g for a 15g dose. Wet all the grounds evenly. At 15 seconds, give the dripper a gentle swirl to ensure full saturation. Hold here until 45 seconds. This bloom phase releases CO2 from freshly roasted coffee and prevents dry pockets that cause uneven extraction. Skipping this step with fresh beans means the CO2 physically pushes water away from the grounds during the main pour. Don’t skip it.
4. Main pours (0:45 to 1:30) Pour in a gentle spiral starting from the center, working outward, and back in again. Avoid pouring directly onto the filter walls, which causes channeling. Reach 250g total water by 1:30. The continuous pour method keeps the slurry agitated and evenly mixed.
5. Rao spin and drawdown Once you’ve reached your target water weight, give the dripper a gentle swirl — the Rao spin technique — to flatten the coffee bed and promote even final drainage. A flat bed after drawdown is your visual confirmation that extraction was even throughout.
6. Target drawdown time
“Target drawdown: 3:00 to 3:30 total brew time from first pour. Adjust grind size if consistently outside this window.”
| Parameter | Hoffmann method | Rao method |
|---|---|---|
| Coffee dose | 15g | 22g |
| Water | 250g | 360g |
| Ratio | 1:16.6 | 1:16.4 |
| Water temp | 93-96°C | 94°C |
| Bloom water | 30g | 60g |
| Bloom duration | 45s | 45s |
| Total brew time | 3:00-3:30 | 3:00-3:30 |
Both methods share the same target brew time. The core mechanics of pour-over are consistent: rinse the filter, bloom thoroughly, pour in spirals avoiding the walls, and swirl at the end for a flat bed. Whichever recipe you start with, these fundamentals hold.
Pro Tip: If your bloom doesn’t bubble much, your beans may not be fresh enough to degas properly. Check the roast date. Specialty beans are best used between 7 and 28 days post-roast for filter coffee. Refer to our best brewing methods guide to understand how roast age affects different brew styles.
Dialing in: adjusting your workflow for your beans and taste
Once you have a standard routine, fine-tuning based on your beans and preferences makes all the difference. No recipe is a permanent answer. Each bag of coffee is slightly different, and so is each brewing environment.
Grind size is your primary lever. A medium-fine grind for V60 is the baseline, but you’ll adjust from there based on taste and drawdown time. If the brew finishes in under 2:30 and tastes sour or sharp, grind finer. If it drags past 3:30 and tastes bitter or hollow, grind coarser. These aren’t just rules of thumb — they reflect the physics of water moving through coffee particles at different speeds.
Light roasts are denser. Freshly roasted light roasts are physically harder beans with more CO2 locked in, which means they resist water penetration more than medium or dark roasts. For light roasts, go slightly finer on the grind and push your water temperature to the top of the range (95-96°C) to open up extraction. Dark roasts are more porous and extract faster, so a slightly coarser grind and lower temperature (92-93°C) prevent over-extraction and bitterness.
Water temperature adjustments:
- Light roast: 94-96°C
- Medium roast: 93-94°C
- Dark roast: 92-93°C
Dose adjustments: If your cup tastes weak even with the right brew time, add 1g to your dose before changing anything else. If it feels too strong, adjust the ratio before touching the grind.
Pro Tip: Keep a simple brew log. Write down dose, grind setting, water temp, and total brew time for every session. After a week of brewing the same bag, patterns emerge that tell you exactly what the beans want.
Adjustment summary:
- Sour, sharp, or thin: grind finer, raise water temp, extend bloom time
- Bitter, astringent, or hollow: grind coarser, lower water temp slightly
- Weak or flat: increase dose or go slightly finer
- Cloudy or muddy: check filter rinse, avoid over-agitation during pours
- Uneven drawdown: ensure spiral pours, check for wall channeling, use Rao spin
Understanding roast level selection before you buy your next bag makes this entire dialing-in process faster. When you know what a bean’s roast level implies about its density and solubility, you start each brew with better assumptions. And when you’re choosing your beans, look for roasters who print the exact roast date, not just a “best by” window, so you know exactly where you are in the degassing curve. Pairing the right beans with a well-understood grind adjustment technique closes the gap between a good cup and a great one significantly.
Common mistakes and how to troubleshoot your cup
No workflow is perfect from the start. Here’s how to catch and fix issues that keep your coffee from tasting its best.
The most common mistake home baristas make is treating flavor problems as a mystery when they’re actually a diagnostic. Every off-note in the cup has a cause, and that cause almost always links back to one of three variables: grind size, water temperature, or pour technique.
Symptom-to-fix guide:
- Sour or sharp taste with fast drawdown (<2:30): Under-extracted. Grind finer. This is the most common extraction issue and usually resolves with a single grind adjustment.
- Bitter or harsh taste with slow drawdown (>3:30): Over-extracted. Grind coarser. Your water is spending too long in contact with the grounds.
- Muddy or cloudy cup: Often caused by pouring too aggressively onto the filter walls, which stirs up fines into the brew. Keep your pours gentle and centered.
- Uneven flow or channeling: Water is finding a path of least resistance through the grounds instead of flowing evenly. This happens when the coffee bed isn’t level or when pours hit the walls. Fix it by swirling during the bloom and using the Rao spin at the end.
- Flat or thin body: Usually a combination of too coarse a grind and water that isn’t hot enough. Check both before adding more coffee to the dose.
- No bloom activity: Beans are stale. CO2 has already off-gassed over time. Use fresher coffee or accept that the bloom step will be less dramatic.
“A flat coffee bed after the final swirl is your single best visual indicator of even extraction. Mounds, craters, or tilted beds all point to flow problems during the brew.”
One troubleshooting technique that works every time: after the drawdown is complete, look at the coffee bed before you pick up the dripper. A perfectly flat, even bed with grounds evenly coated across the surface means the water moved through consistently. Anything else — and especially a crater in the center or grounds stuck to the sides — tells you where the flow went wrong.
For home brewing methods beyond the V60, many of these same diagnostics apply. And if you’re still seeing an uneven bloom after adjusting technique, revisit blooming troubleshooting for deeper guidance.
What most home baristas get wrong about filter coffee workflow
Here’s an uncomfortable truth: most people who brew filter coffee at home treat a good recipe like a permanent solution. They find something that works, lock it in, and then wonder why the cup tastes different from bag to bag or even day to day.
The problem isn’t the recipe. It’s the assumption that a recipe is fixed.
Coffee changes. A bag that tasted floral and bright at day 10 post-roast will taste fuller and more rounded at day 20. Humidity affects how quickly your grind flows. Room temperature affects how fast your dripper loses heat. None of this means you need to completely re-dial every brew, but it does mean the best filter coffee comes from observation, not repetition.
The steps that home baristas most commonly skip are the ones that require attention rather than technique. Rinsing the paper filter. Actually watching the drawdown and noting the time. Checking the coffee bed before removing the dripper. These aren’t complicated. They take about 10 extra seconds each. But they give you information that changes your next brew.
We’re also firm believers that understanding coffee blooming isn’t just a technical checkbox — it’s a feedback signal. A vigorous, domed bloom means your beans are fresh and CO2-rich. A weak, flat bloom tells you the beans are older, which means you should extend bloom time and possibly grind slightly finer to compensate. That one observation adjusts your entire brew before you’ve even started the main pour.
The baristas who brew the most consistently great coffee aren’t the ones who follow recipes most rigidly. They’re the ones who stay curious, taste critically, and make one small adjustment at a time. Precision matters. But precision in service of curiosity beats precision in service of routine every single time.
Step up your workflow with premium specialty coffee
Ready to put your new skills to the test? The best way to solidify your workflow is to run it with beans that reward careful brewing.
Our Colombia single origin is an ideal starting point — a clean, well-structured bean that responds clearly to grind and temperature adjustments, making it easy to read what your workflow is doing right. If you want something with more complexity to challenge your technique, our Costa Rica specialty brings bright acidity and layered fruit notes that bloom beautifully at 94°C. Every bag is roasted small-batch and ships at peak freshness, so you’re starting each brew with beans that actually have something to give. Explore our full library of brewing guides to keep experimenting and building your skills.
Frequently asked questions
What is the ideal water temperature for V60 filter coffee?
The optimal water temperature for V60 filter coffee is between 92°C and 96°C, with lighter roasts benefiting from the higher end of that range.
How do I know if my grind size is correct for filter coffee?
Start with a medium-fine grind that resembles coarse table salt, then adjust coarser if the cup tastes bitter and the brew ran long, or finer if it tastes sour and finished quickly.
Why is the blooming phase important in filter coffee?
Blooming releases CO2 from freshly roasted coffee and ensures even water saturation across the grounds, which sets up balanced extraction during the main pour.
What’s the ideal total brew time for hand-brewed filter coffee?
Aim for a total brew time of 3:00 to 3:30 from the first pour to the final drip, and use drawdown time as your primary grind adjustment signal.
Can I use tap water for filter coffee?
Filtered water is strongly preferred because tap water mineral content varies widely and directly affects how your coffee extracts and tastes, often adding off-flavors that obscure the bean’s natural character.
Recommended
- Master the cold brew coffee workflow: perfect home brewing – Adira Coffee US
- Master the freshness workflow for coffee: ultimate home guide – Adira Coffee US
- How to brew specialty coffee at home: a precise guide – Adira Coffee US
- Expert coffee brewing tips for better flavor at home – Adira Coffee US
- How to select coffee beans for great home brewing flavor – Tri Crow Coffee