
Start with roughly 99 grams of coffee to about 1.8 liters of water (about 12 Breville scoops for a full carafe, or roughly 2 scoops per 20 ounce mug), set the machine to Gold mode, and confirm your water temperature is within the device’s adjustable range before brewing. Use the cone basket for anything under eight cups; switch to the flat or mesh basket for a full carafe. That single combination, ratio plus mode plus basket, solves most of what goes wrong with this machine.
TL;DR:
- Using the cone basket for small batches and switching to flat or mesh baskets for full carafes prevents common issues like under-extraction and weak flavor.
- Adjusting brew temperature by a few degrees based on roast level or bean freshness is key to achieving balanced extraction and avoiding sour or bitter notes.
- The My Brew setting allows precise control over bloom time, flow rate, and temperature, which should be fine-tuned through side-by-side testing for optimal flavor.
- Cold brew optimization requires a higher coffee-to-water ratio, cold water only, and steep times between 8 to 14 hours for a smooth, low-bitter concentrate.
- Routine maintenance, including water hardness setting and descaling, is essential to sustain consistent brew quality and prevent clogs or flavor degradation.
Table of Contents
- Breville Precision Brewer Recipe for a Balanced Everyday Pot
- My Brew Settings: Five Presets for Different Flavor Goals
- Cold Brew Mode: Ratios and Steep Times That Actually Work
- Fixing the Most Common Precision Brewer Problems
- Starter Presets for Adira Coffee’s African, Love, and Ocean Blends
- When the Precision Brewer Beats Pour-Over, and When It Doesn’t
- Try These Blends With the Presets Above
- Where These Settings Come From
- Sources
Breville Precision Brewer Recipe for a Balanced Everyday Pot
The Gold setting is the closest thing to a factory-certified recipe this machine has. Breville built it to match SCA Gold Cup standards, which call for a standard coffee-to-water ratio brewed through a cone basket for even extraction. For a full 1.8 liter (60 ounce) carafe, the recommended amount is about 99 grams of coffee, or 12 Breville scoops. For smaller batches, scale down proportionally.
Weighing your dose on a kitchen scale beats scooping every time. Scoops vary depending on how tightly you pack grounds, and a few grams off at this ratio changes the whole cup. If you do scoop, use the same scoop consistently and note it, since the manual itself recommends weight-based dosing for repeatable results.
Basket choice matters more than most people assume. The cone insert concentrates flow through a smaller area, which is why it’s the right call for 2 to 8 cup batches, anything less and a wider basket lets water rush past the grounds without extracting much. For a full carafe, switch to the flat or mesh basket so water disperses evenly across the wider bed of coffee. Using the wrong basket for your batch size is the number one reason home brewers get a thin, sour pot despite using a “correct” ratio.
Here’s the full sequence for a standard Gold brew:
- Grind your beans to a medium coarse consistency, similar to coarse sea salt.
- Insert the correct basket (cone for small batches, flat or mesh for full carafe).
- Load your measured dose into the basket and give it a light shake to level the bed.
- Select Gold on the control panel and confirm the carafe is seated correctly.
- Start the brew and let it run without opening the lid.
- Once brewing finishes, give the carafe a gentle swirl before pouring to redistribute settled grounds.
A few adjustments worth knowing before you commit to one setting forever:
- Light roasts extract more fully at the top of the range, closer to 205°F, since their denser cell structure resists extraction.
- Dark roasts benefit from dropping a couple of degrees toward 197°F, since higher heat pulls out more bitterness from beans that are already more soluble.
- If your pot tastes flat no matter the temperature, check your grind first. Temperature adjustments are a fine tune, not a fix for a grind size problem.
My Brew Settings: Five Presets for Different Flavor Goals
Gold mode is the reliable default. My Brew is where the machine actually gets interesting, because it lets you isolate and adjust the three variables that shape flavor: bloom time, brew temperature, and flow rate. Breville’s own tutorial on the My Brew setting walks through the control layout, but the values below are starting points tuned to specific outcomes.
A quick primer before the presets: bloom time is how long the grounds sit saturated with a small amount of water before full brewing starts, typically 0 to 300 seconds. Flow rate controls how fast water passes through the grounds, fast, medium, or slow, which directly affects contact time and body. Brew temperature runs 197°F to 205°F on this machine, and adjustable PID temperature control is the feature that makes these presets possible instead of theoretical.
Balanced (everyday drip): 202°F, 45 second bloom, medium flow, 99 g dose (12 scoops) for a full carafe, medium grind. This is Gold mode’s flavor profile if you wanted to rebuild it manually.
Bright (citrusy, high-acidity beans): 205°F, 30 second bloom, fast flow, medium-fine grind. Shorter contact time preserves the lighter, more acidic notes instead of pulling them into muddiness.
Fruity (washed African-style beans): 203°F, 60 second bloom, medium flow, medium grind. The longer bloom lets aromatic compounds develop before the main pour, which is where a lot of the fruit character actually lives.
Earthy (Sumatra-style, heavier body): 199°F, 30 second bloom, slow flow, medium-coarse grind. Slower flow increases contact time, which builds body without dragging in bitterness at the lower temperature.
Strong (concentrated, still filter-brewed): 201°F, 45 second bloom, slow flow, coarser dose at roughly 110 g per full carafe, medium-coarse grind. More coffee plus slower flow gets you strength without crossing into over-extraction.
Once you’ve entered a preset, save it under a name that tells you something later, roast name and date works better than “Preset 1.” Freshness shifts flavor fast enough that a bag brewed on day 2 needs a slightly different temperature than the same bag on day 10, since degassing changes how water and grounds interact during the bloom phase.
To actually validate any preset, change one variable at a time and brew twice. Adjust temperature only, keep everything else identical, and taste both cups side by side. This two-brew A/B method is the fastest way to learn what each control actually does instead of guessing, and it mirrors the same systematic troubleshooting approach that works for dialing in espresso.
Pro Tip: If a My Brew preset won’t save, double check that you’ve selected a basket type compatible with your dose. The machine sometimes rejects a save when the volume setting doesn’t match what’s physically loaded, which shows up as a silent failure rather than an error message.
The most common My Brew mistake isn’t a bad parameter choice, it’s a mismatched basket. Running a Bright preset built for a small cone-basket batch through a full carafe with the flat basket installed will give you a completely different result than the one you dialed in, because flow rate behaves differently across basket geometries.
Cold Brew Mode: Ratios and Steep Times That Actually Work
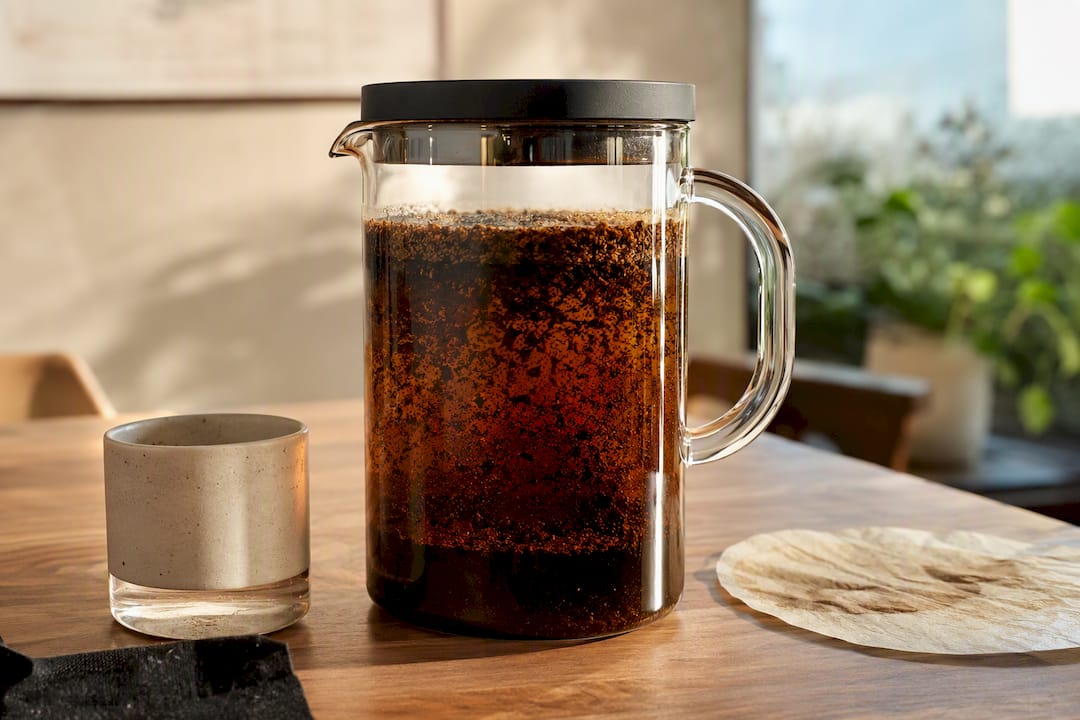
Cold Brew mode uses full immersion, not drip, so the ratio is higher than for a standard hot brew. Breville’s guidance recommends a higher coffee-to-water coffee dose for 600 milliliters of water, roughly equivalent to 12 scoops for that batch.
- Remove the cone or mesh basket insert entirely, per the instruction manual’s Cold Brew section, and load a paper filter directly instead.
- Add your coarse-ground coffee, then chilled or room-temperature water. Never use hot water in this mode.
- Leave the carafe lid off during the steep cycle, then select your steep time, anywhere from 4 to 24 hours.
- Shorter steeps on the order of several hours produce a brighter, less bitter concentrate; longer steeps up to a day increase strength and body.
The 8 to 14 hour range tends to hit the sweet spot: full immersion at this range produces a smooth concentrate with noticeably less bitterness than heat-extracted cold brew methods. Once brewed, you’ve got concentrate, not a finished drink. Cut it roughly 1:1 with water or milk for a standard glass, or go lighter (1 part concentrate to 2 parts water) if the batch steeped past 16 hours and tastes heavier than you want.
Fixing the Most Common Precision Brewer Problems
Most complaints about this machine trace back to three fixable habits, not machine defects.
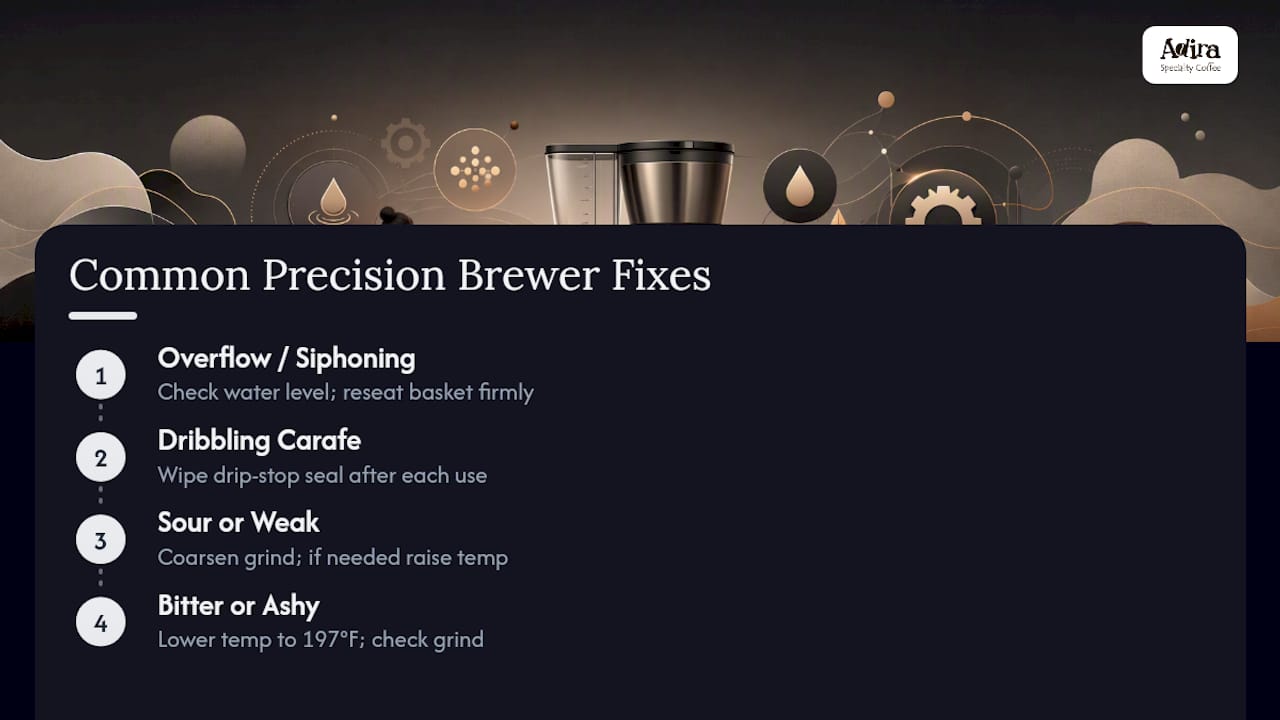
Overflow or siphoning. This happens most often when water sits above the single-cup fill line while a small basket is installed, or when the basket isn’t seated flush. Check your water level against the marked line for your batch size before you check anything else, and reseat the basket firmly if you notice water pooling around the edges instead of dripping through center.
A carafe that dribbles after pouring. This is almost always a seal issue on the drip-stop mechanism. Consumer Reports flagged carafe handling and drip-stop behavior as a usability point worth monitoring, and a quick wipe of the seal after each use prevents residue buildup that causes slow drips.
Sour or weak coffee. Try grind size first, coarser grinds under-extract fast. If that doesn’t fix it, raise brew temperature a couple of degrees before touching your dose.
Bitter or ashy coffee. Drop temperature toward 197°F, then check whether your grind has drifted too fine. Dark roasts are especially sensitive to over-extraction at high heat.
Pro Tip: Set your water hardness level in the machine’s settings before your first brew. Skipping this step is the reason many owners see mineral buildup faster than expected, which throws off both temperature accuracy and flow rate over time.
Descale on the schedule your water hardness setting recommends, don’t wait for visible buildup. Consumer Reports and independent testers both note that routine maintenance, descaling and drip-stop cleaning specifically, has a measurable effect on brew flow and flavor consistency, and the same logic that keeps an espresso machine tasting clean applies here. Keep a small stock of paper filters on hand if you use them for cold brew, running out mid-steep is a common, entirely avoidable annoyance.
Starter Presets for Adira Coffee’s African, Love, and Ocean Blends
Bean origin and roast level should drive your My Brew numbers more than any general rule. Here’s where to start with three specific blends:
- African Blend: 99 g dose, medium grind, 203°F, 45 second bloom, medium flow. This setting favors the bright, fruit-forward character typical of East African lots without tipping into sourness.
- Love Blend: 99 g dose, medium grind, 201°F, 45 second bloom, medium flow. A moderate, rounded setting suited to a blend built for balance over any single dominant note.
- Ocean Blend: 105 g dose, medium-coarse grind, 199°F, 30 second bloom, slow flow. The slightly lower temperature and slower flow lean into body and depth rather than acidity.
Freshness shifts all three. A bag brewed within its first week off the roaster tends to need a slightly shorter bloom, since active degassing already aerates the grounds; a bag past the two-week mark often benefits from a few extra seconds of bloom and a degree or two more heat to compensate for lost aromatics. My Brew exists specifically to let you accentuate these origin-driven differences rather than settle for one generic setting across every bag you own. Run the two-brew comparison from earlier in this article on any of these three before locking in a permanent preset.
When the Precision Brewer Beats Pour-Over, and When It Doesn’t
The Precision Brewer earns its place on the counter for three jobs: a repeatable morning pot you don’t want to think about, brewing for guests where consistency across a full carafe matters more than micro-tuning one cup, and cold brew, where full immersion mode does something manual methods can’t replicate easily at home.
Manual pour-over still wins for single-cup nuance, when you want to adjust pour speed mid-brew based on how the bloom looks, no automated system reacts to what’s actually happening in the basket.
Give yourself a week of small, one-variable tests before trusting any preset permanently. Change one thing, taste, log it, repeat. That’s the fastest path to actually understanding your machine instead of just owning it.
— Stefan
Try These Blends With the Presets Above
Freshly roasted beans make every one of these settings work better than a bag that’s been sitting on a supermarket shelf for months. Adiracoffee roasts to order in small batches in California and ships within days, so the temperature and bloom adjustments above actually matter instead of compensating for stale coffee.
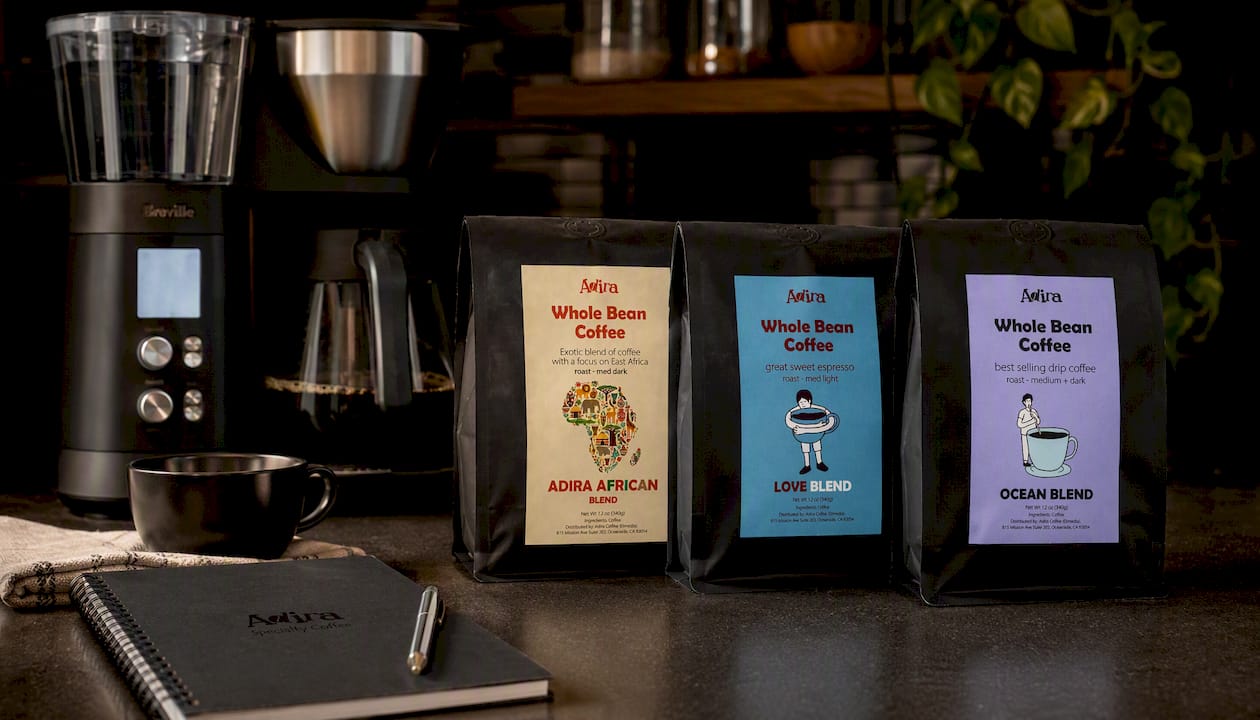
The African Blend pairs well with the 203°F, medium flow preset outlined above if you want bright, fruit-forward mornings. The Love Blend fits the 201°F balanced setting for a rounder, everyday cup. The Ocean Blend leans into body at 199°F with slower flow. A subscription locks in 10% savings and free US shipping on orders over $35, and it solves the freshness variable that changes your bloom and temperature settings every couple of weeks. Pick a blend, dial in the starter preset, and adjust from there.
Where These Settings Come From
- Breville Precision Brewer Thermal instruction manual (BDC455) covers Gold mode, dosing ratios, and Cold Brew steep instructions.
- Breville’s My Brew tutorial walks through adjusting bloom, temperature, and flow directly on the machine.
- Consumer Reports’ lab testing measured brew temperature against recommended guidelines and evaluated carafe handling.
Check your machine’s manual for model-specific warnings and the correct water hardness setup before your first brew.
Sources
- Breville Precision Brewer Thermal instruction manual (BDC455)
- Breville Precision Brewer Thermal — Consumer Reports review
- Customizing with the My Brew setting — Breville tutorials