
TL;DR:
- Mastering latte art depends on well-extracted espresso, proper milk microfoam at 140–150°F, and controlled pouring. Practicing with the right tools and techniques improves microfoam quality, shot consistency, and design accuracy over time. Consistent daily practice and attention to milk texture and temperature are key to developing skilled latte art at home.
A latte art tutorial is the step-by-step process of creating visually appealing designs on espresso-based drinks by mastering milk steaming and controlled pouring techniques. The skill rests on three coordinated elements: a well-extracted espresso shot, properly textured microfoam, and deliberate pour mechanics. Most beginners assume milk alone creates the art. The pour control matters just as much. This guide walks you through every stage, from choosing the right tools to executing the heart, rosetta, and tulip patterns with confidence.
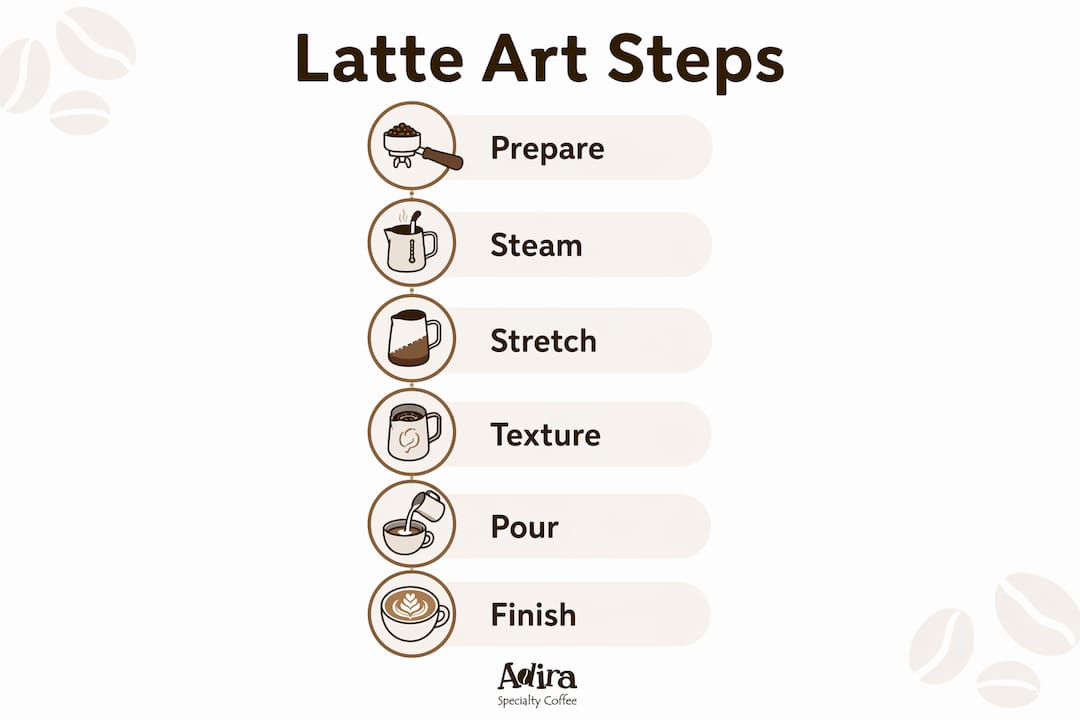
What do you need for a latte art tutorial at home?
The right equipment removes most of the guesswork from learning coffee art techniques. Two tools matter above everything else: a 12-ounce stainless steel pitcher and a milk thermometer.
A 12 oz stainless steel pitcher is the standard choice for home baristas. Glass or ceramic pitchers do not transfer heat to your hand, so you lose the tactile feedback that tells you when to stop steaming. Stainless steel lets you feel the temperature rise in real time. A milk thermometer costing $10–$15 removes all guesswork from temperature control.
Cold whole milk, stored below 40°F, gives you the longest steaming window before the milk overheats. That extra time lets you build better texture. Oat milk works as a substitute, though it produces slightly less stable foam than whole milk.
Your espresso setup needs to pull a consistent shot with visible crema. A basic home espresso machine with a steam wand is enough to start. Check the espresso equipment essentials guide from Adiracoffee for a full breakdown of what to look for.
| Tool | Purpose | Notes |
|---|---|---|
| 12 oz stainless steel pitcher | Steaming and pouring | Provides tactile heat feedback |
| Milk thermometer | Temperature accuracy | Aim for $10–$15 models |
| Home espresso machine | Shot and steam source | Must have a steam wand |
| Cold whole milk | Best foam texture | Store below 40°F |
How do you steam milk to perfect microfoam?
Milk steaming is the single most important skill in latte art step by step. Get it wrong and no amount of pouring skill will save the design.

The process has two distinct phases. The first is stretching: submerge the steam wand tip just below the milk surface and open the valve fully. You should hear a soft, paper-tearing hiss. That sound means you are incorporating air correctly. A loud screech means the wand tip is too deep or too shallow, and you are creating large, unstable bubbles. Stretching lasts 3–5 seconds and increases milk volume by 20–50%.
The second phase is texturing: submerge the wand tip deeper and angle the pitcher so the milk spins in a whirlpool. This breaks down large bubbles into the fine, glossy microfoam you need for latte art designs. The ideal temperature range is 140–150°F. Overheating above 160°F scalds the milk and destroys the texture permanently.
After steaming, act immediately. Tap and swirl the pitcher on the counter until the milk looks glossy and paint-like. Delayed swirling lets foam separate from liquid, which ruins the pour before it starts.
The numbered steps for steaming:
- Fill the pitcher one-third full with cold whole milk.
- Purge the steam wand for one second to clear condensation.
- Submerge the wand tip just below the surface and open the valve.
- Stretch for 3–5 seconds, listening for a soft hiss.
- Drop the wand tip deeper and angle the pitcher to create a whirlpool.
- Stop steaming at 140–150°F.
- Tap the pitcher firmly on the counter, then swirl until glossy.
Pro Tip: Practice steaming with a pitcher of water and a drop of dish soap. The soap mimics milk foam and lets you build pouring skills without wasting milk during early drills.
How do you pour the heart design step by step?
The heart is the foundational pattern in every latte art step by step system. Master it first, and every other design becomes easier.
Fresh espresso crema is non-negotiable. Crema older than two minutes degrades rapidly, causing milk to sink instead of float on the surface. Pull your shot and pour within 90 seconds.
Tilt the cup toward you at roughly a 45-degree angle. This shortens the distance milk must travel and keeps the crema intact during the initial pour.
The numbered steps for the heart:
- Hold the pitcher 4–6 inches above the cup and pour steadily. This high pour mixes milk under the crema without disturbing the surface.
- Continue the high pour until the cup is 60–70% full.
- Lower the pitcher spout to 0.5–1 inch above the surface. White microfoam will bloom on top of the espresso.
- Hold the spout steady and maintain a consistent flow to build a round white base.
- When the cup is nearly full, push the pitcher forward through the center of the white circle and lift slightly. This cuts the circle and creates the point of the heart.
Hesitation when lowering the pitcher is the most common cause of poor shapes. Commit to the drop and keep the flow steady. Expect 10–20 repetitions before the heart looks consistent. That is normal, not a sign of failure.
What are the rosetta and tulip techniques?
Once the heart feels natural, the rosetta and tulip expand your range of latte art designs considerably.
The rosetta requires a wiggle technique. Lower the pitcher close to the surface as you would for a heart, but instead of holding steady, move the pitcher side to side in a rhythmic wave while slowly pulling it backward toward the far edge of the cup. The width of each wiggle determines the leaf width. Faster wiggles create tighter, more defined leaves. End the pour by pushing forward through the center, just like the heart finish, to form the stem.
The tulip uses a layered dot approach:
- Start with a short burst of milk from close range to create a white dot on the surface.
- Stop the pour briefly, then add a second dot behind the first.
- Repeat for a third dot if the cup size allows.
- Finish by pulling the pitcher forward through all three dots in one smooth motion. This creates the stacked petal effect.
Cup tilt and pitcher angle affect both patterns significantly. A steeper cup tilt gives you more surface area to work with. Keeping the pitcher spout low and centered prevents the design from drifting to one side.
Practice drills that build speed: pour the rosetta wiggle motion into a clear glass of water to watch how the flow behaves. For the tulip, practice the stop-and-start rhythm on a kitchen counter using just the pitcher. Building muscle memory for the motion separately from the actual pour accelerates progress. The home barista skills guide from Adiracoffee covers how to structure deliberate practice sessions effectively.
Common challenges and how to fix them
Most problems in latte art for beginners trace back to either the milk or the pour, not both at once. Diagnosing the right cause saves time.
Common issues and fixes:
- Foam too thick or bubbly. Over-aeration during the stretching phase. Reduce stretching time to 2–3 seconds and listen for the soft hiss, not a loud gurgle. Thick or dry foam separates in the cup and destroys the design before you even pour.
- Milk sinks into the espresso. The crema is too old or the pour height is too low from the start. Always pour within 90 seconds of pulling the shot and begin high.
- White blob instead of a shape. The pitcher dropped too early or the flow rate spiked. Practice a smooth, controlled drop rather than a sudden plunge.
- Design drifts to one side. The cup is not tilted evenly or the pitcher is angled off-center. Check your grip and cup position before each pour.
- No white foam appears on the surface. The milk was overheated or under-swirled after steaming. Restart with fresh cold milk and check your thermometer.
Pro Tip: When a pour fails, do not dump the cup immediately. Study what the surface looks like. The pattern of failure tells you exactly which phase went wrong, whether steaming or pouring. Treat every bad cup as diagnostic data rather than a wasted attempt.
Consistent practice matters more than perfect equipment. Fifteen minutes of focused daily practice builds skill faster than occasional long sessions. Set a small goal each session, such as landing the heart shape three times in a row, before moving to the next pattern.
Key Takeaways
Latte art requires well-extracted espresso, glossy microfoam at 140–150°F, and controlled pour mechanics executed in the correct sequence.
| Point | Details |
|---|---|
| Milk texture is foundational | Aim for glossy, paint-like microfoam; thick or bubbly foam ruins every design. |
| Temperature control is critical | Stop steaming at 140–150°F; overheating above 160°F destroys texture permanently. |
| Start with the heart pattern | Master the high-to-low pour and 10–20 repetitions before advancing to rosetta or tulip. |
| Fresh crema is non-negotiable | Pour within 90 seconds of pulling the shot to keep the crema surface intact. |
| Practice without wasting milk | Use water and dish soap to drill pouring mechanics before committing to real milk. |
What I have learned from hundreds of failed pours
Most latte art guides focus on the pour. I spent months obsessing over my pouring motion before realizing the real problem was always the milk. When the texture is right, the pour almost takes care of itself. When the texture is wrong, no technique fixes it.
The biggest mistake I see home baristas make is rushing the texturing phase. They hit 140°F and stop, but the whirlpool has not had enough time to break down the larger bubbles. The milk looks fine in the pitcher but falls apart the moment it hits the espresso. Slow down the texturing phase and watch the surface of the milk. When it shifts from matte to glossy, you are ready.
I also think people underestimate how much the espresso itself matters. A flat, thin shot with no crema is not a canvas. You cannot paint on water. Investing time in dialing in your espresso extraction pays off in latte art faster than any pouring drill. The brewing tips Adiracoffee publishes helped me rethink extraction before I ever touched a pitcher.
Early mistakes are not failures. They are the fastest feedback loop available. Every blob, every sunken design, every overheated pitcher teaches you something a video tutorial cannot. Give yourself 30 days of daily practice before judging your progress.
— Stefan
The coffee behind your latte art matters
Great technique deserves great coffee. Adiracoffee roasts single-origin and signature blends to order in small batches in California, shipping within days of roasting so the espresso you pull is genuinely fresh.

The Mushroom Coffee Medium Roast pulls a rich, balanced shot with a stable crema that holds up beautifully under a milk pour. If you prefer something bolder, the Mushroom Coffee Dark Roast delivers a deeper base that contrasts sharply with white microfoam. Both are roasted from ethically sourced beans and ship free on US orders over $35. Subscriptions save you 10% automatically. Your latte art practice deserves a coffee that keeps up with your skills.
FAQ
What milk is best for latte art at home?
Cold whole milk stored below 40°F produces the most stable microfoam for latte art. Oat milk works as a substitute but creates slightly less consistent texture.
What temperature should steamed milk be for latte art?
Steamed milk should reach 140–150°F for latte art. Temperatures above 160°F scald the milk and destroy the microfoam texture needed for designs.
How long does it take to learn latte art?
Most beginners produce a recognizable heart after 10–20 repetitions. Consistent daily practice of 15 minutes accelerates skill development faster than occasional longer sessions.
Why does my latte art sink into the espresso?
Milk sinking into espresso usually means the crema is older than two minutes or the initial pour height is too low. Pull a fresh shot and begin pouring from 4–6 inches above the cup.
Can I practice latte art without wasting milk?
Yes. Fill a pitcher with water and add a drop of dish soap to simulate milk foam. This method lets you practice pouring mechanics and build muscle memory without using milk on every attempt.