
TL;DR:
- Pour over coffee is a manual brewing method that allows precise control over variables like grind size and pour technique to produce a clean, flavorful cup. Mastery requires specific equipment, correct process steps, and adjustments based on taste and brew timing, with a focus on consistency and understanding each variable’s impact. Investing in fresh beans and practicing systematic adjustments leads to improved flavor, revealing the full potential of high-quality coffee.
Pour over coffee is a manual brewing method where hot water is poured in controlled stages over ground coffee to extract a clean, customized cup with exceptional clarity. Unlike automatic drip machines, this method puts every variable in your hands: grind size, water temperature, pour speed, and timing. The result is a cup that reflects your preferences precisely. To get there, you need a burr grinder, a gooseneck kettle, a digital scale, and fresh beans worth brewing. This guide covers every step, from setup to troubleshooting, so you can dial in your ideal pour over with confidence.
What tools and ingredients you need to make pour over coffee
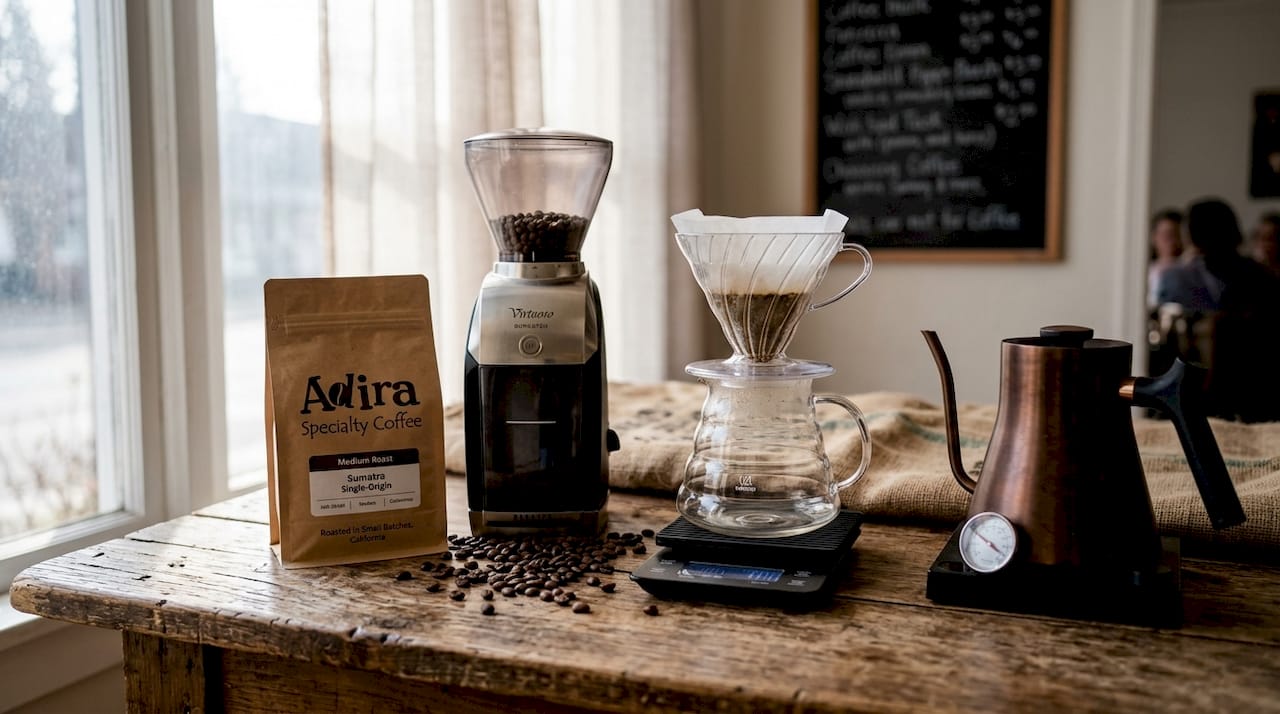
The right equipment is not optional in pour over brewing. Each tool serves a specific function, and substituting a blade grinder for a burr grinder or eyeballing measurements instead of using a scale will produce inconsistent results every time.
The core equipment list:
- Burr grinder (Baratza Encore, Fellow Ode, or similar): produces uniform particle size, which is the single biggest factor in even extraction
- Gooseneck kettle (Fellow Stagg EKG or Bonavita Variable): the narrow spout gives you precise control over flow rate and pour direction
- Digital scale: measures both coffee and water in grams for repeatable results
- Pour over dripper: choose from the Hario V60, Chemex, or Kalita Wave depending on your preference (more on this below)
- Paper filters: match to your dripper model; always use the correct size
- Filtered water: tap water with chlorine or heavy minerals will affect flavor noticeably
For beans, a medium roast single-origin coffee works best when you are learning. It has enough sweetness to reward good technique and enough clarity to expose errors. Adiracoffee’s Colombia single origin, sourced from small farms and roasted to order in California, is a strong starting point for pour over coffee brewing.
Pro Tip: Buy whole beans and grind immediately before brewing. Pre-ground coffee loses volatile aromatics within 15 to 30 minutes of grinding, which flattens the cup noticeably.
The standard starting ratio is 1:16 coffee to water, meaning 20 grams of coffee to 320 grams of water. This ratio produces a balanced cup and gives you a reliable baseline before you start adjusting.
How to make pour over coffee step by step
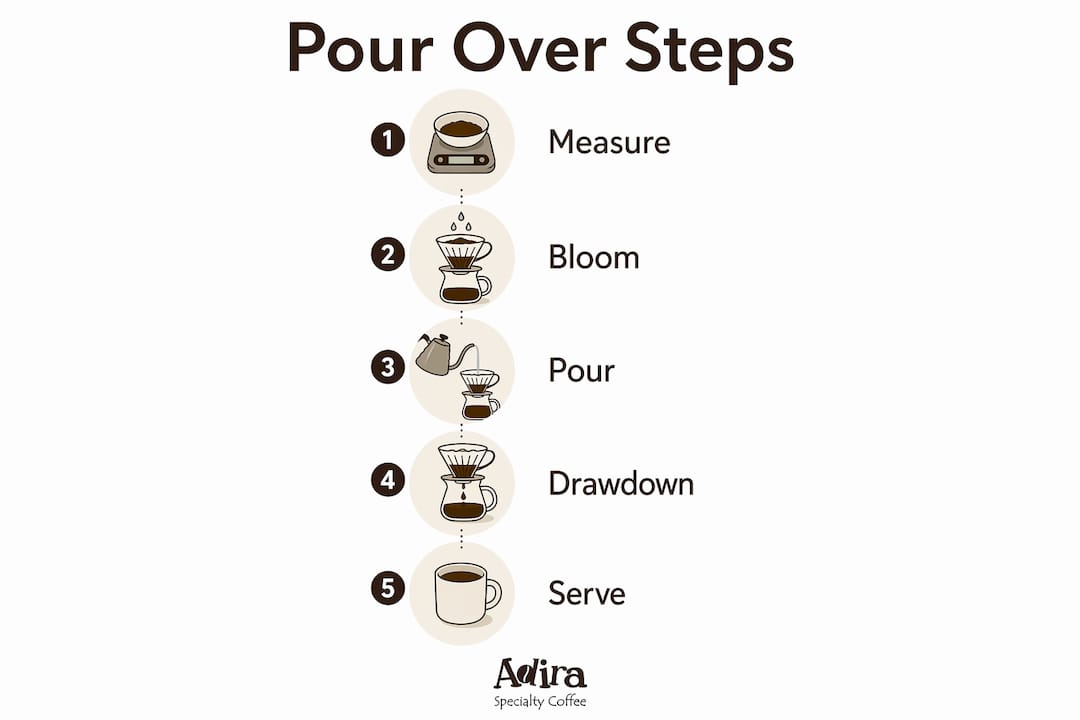
A repeatable process is what separates a good cup from a great one. Follow this sequence exactly until you understand what each step contributes, then adjust from there.
-
Heat your water. Target 195 to 205°F, with 200°F as the default for medium roasts. If you do not have a thermometer, bring water to a boil and let it rest for 30 seconds.
-
Rinse the filter. Place the paper filter in your dripper, set it over your cup or carafe, and pour hot water through it. Rinsing the filter preheats the dripper and removes the papery taste that would otherwise transfer to your cup. Discard the rinse water.
-
Grind your coffee. Grind 20 grams of beans to a medium-fine consistency, roughly the texture of coarse sand. Add the grounds to the filter and gently shake the dripper to level the bed.
-
Bloom the grounds. Start your timer and pour 40 to 60 grams of water evenly over the grounds in a slow spiral. Blooming pours twice the coffee weight in water and releases trapped CO2, which would otherwise create uneven extraction if left unchecked. Wait 30 to 45 seconds and watch the grounds bubble and swell.
-
Pour in pulses. Add the remaining water in two to three slow, circular pours, working from the center outward in a spiral. Pulse pouring with pauses between each addition lets the bed drain evenly and prevents channeling. Avoid pouring directly at the filter walls.
-
Monitor drawdown. Your total brew time, from first pour to complete drawdown, should land between 2:30 and 3:30 minutes. A typical pour over finishes in 2 to 3 minutes of active brewing, not counting water heating.
-
Serve immediately. Remove the dripper, give the cup a gentle swirl, and drink while hot. Pour over coffee loses its aromatic complexity quickly as it cools.
| Step | Target |
|---|---|
| Coffee dose | 20 g |
| Water volume | 320 g (1:16 ratio) |
| Water temperature | 200°F (medium roast default) |
| Bloom water | 40 to 60 g for 30 to 45 seconds |
| Total brew time | 2:30 to 3:30 minutes |
Pro Tip: Place your scale under the dripper and tare it to zero before you start. Weighing water as you pour is far more accurate than measuring by volume, and it keeps your ratio consistent every single time.
How to adjust grind, temperature, and pour for better flavor
Once you have the basic process down, flavor refinement comes from adjusting one variable at a time. Changing multiple things at once makes it impossible to know what actually improved the cup.
Grind size is your primary lever. If the coffee tastes sour or sharp, the extraction is too low. Go finer. If it tastes bitter or harsh, the extraction is too high. Go coarser. Bitter means coarser; sour means finer is the rule that applies across every pour over method. Understanding why grind size matters this much comes down to surface area: finer grounds expose more coffee to water, increasing extraction rate.
Water temperature shifts flavor profile. Light roasts need hotter water, closer to 205°F, to fully extract their complex acids and florals. Dark roasts do better around 195°F because they are already more soluble and hotter water pushes them into bitterness. The 195 to 205°F range covers the full spectrum of roast profiles.
Use drawdown time as feedback. If the water drains through in under 2:30, your grind is too coarse and the water is moving too fast for full extraction. If it takes longer than 3:45, your grind is too fine and the bed is restricting flow. Drawdown timing works as a feedback loop that tells you exactly which direction to adjust before you even taste the cup.
Pour technique affects extraction evenness. A slow, steady spiral from center to edge saturates the entire bed uniformly. Pouring too fast or in one spot creates channels where water rushes through without contacting most of the grounds. Consistent flow and even saturation through measured pulses is the difference between a flat cup and a layered one.
Pro Tip: Keep a simple brewing log. Note your grind setting, dose, water temperature, and total brew time for each session. After three or four brews, patterns emerge that tell you exactly where to adjust.
Which pour over dripper is right for you?
The dripper you choose shapes the flavor of your cup more than most people expect. Each model has a different filter thickness, bed geometry, and flow rate, all of which change how water interacts with the grounds.
| Dripper | Filter type | Grind size | Brew time | Cup character |
|---|---|---|---|---|
| Hario V60 | Thin paper | Medium-fine | 2:30 to 3:30 min | Bright, complex, tea-like |
| Chemex | Thick paper | Medium-coarse | 4 to 5 min | Clean, smooth, low sediment |
| Kalita Wave | Flat-bottom paper | Medium | 3 to 4 min | Balanced, forgiving, consistent |
The V60 uses a medium-fine grind and rewards precise pouring technique. It is the most responsive dripper, meaning small changes in grind or pour speed produce noticeable flavor shifts. That makes it ideal for experienced brewers who want maximum control.
The Chemex uses a significantly thicker filter, which removes more oils and fine particles from the brew. The result is a remarkably clean cup with low bitterness. Chemex requires a coarser grind and longer brew time because the dense filter slows water flow considerably. It is the best choice if you prioritize clarity over complexity.
The Kalita Wave’s flat-bottom design distributes water more evenly across the grounds, which makes it the most forgiving of the three. Slight variations in pour speed or technique have less impact on the final cup. For anyone new to manual brewing, the Kalita Wave is the most reliable path to a consistent result from day one.
Common mistakes that ruin a pour over (and how to fix them)
Even experienced brewers fall into predictable traps. Knowing what goes wrong and why makes it much faster to correct.
- Skipping the filter rinse. Skipping filter rinsing results in papery flavor that masks the coffee’s actual taste. This takes 10 seconds to prevent and is never worth skipping.
- Rushing or skipping the bloom. Without a proper bloom, CO2 trapped in fresh grounds creates uneven extraction and a flat, underdeveloped cup. Always bloom for the full 30 to 45 seconds.
- Pouring too fast. Speed creates turbulence and channeling. A slow, deliberate pour is not just aesthetic. It is functional.
- Using stale beans. Coffee brewed within two to four weeks of roast date blooms visibly and tastes dramatically better. Beans sitting in a grocery store bin for months will not bloom at all, which is a reliable sign of low CO2 and lost freshness.
- Changing multiple variables at once. If you adjust grind size and water temperature in the same brew, you cannot isolate what changed the flavor. Fix one thing per session.
- Not documenting results. Memory is unreliable. A short note after each brew builds a reference that makes improvement systematic rather than accidental.
Pro Tip: If your bloom looks flat with minimal bubbling, your beans are past their peak. Fresh specialty coffee, roasted within the last two weeks, will dome and bubble noticeably during the bloom phase.
Key takeaways
Mastering pour over coffee requires controlling grind size, water temperature, and pour technique in sequence, with drawdown time as your primary feedback signal.
| Point | Details |
|---|---|
| Start with the right ratio | Use 20 g coffee to 320 g water (1:16) as your baseline before adjusting. |
| Bloom every time | Pour 40 to 60 g water over grounds and wait 30 to 45 seconds to release CO2 for even extraction. |
| Grind size drives flavor | Bitter cup means go coarser; sour cup means go finer. Adjust one variable at a time. |
| Match dripper to your style | V60 rewards precision, Chemex delivers clarity, Kalita Wave offers consistency for beginners. |
| Use drawdown as feedback | Under 2:30 means grind finer; over 3:45 means grind coarser. |
Why pour over changed how I think about coffee
I have been roasting and brewing coffee for years, and the honest truth is that pour over taught me more about coffee than any other method. Not because it is complicated, but because it refuses to hide your mistakes. A French press forgives a lot. An automatic drip machine does the work for you. Pour over shows you exactly what happens when you change one thing.
The variable that surprises most people is water temperature. I spent months brewing light roasts at 200°F and wondering why the florals never came through. Bumping to 205°F on an Ethiopian natural was like turning up the volume. The jasmine and berry notes that were barely there became the whole cup. That single adjustment, one variable, five degrees, changed everything.
What I tell anyone starting out: do not chase the perfect cup on day one. Brew the same recipe three times in a row and get it consistent first. Consistency is the foundation. Once you can reproduce a result, you can improve it. Chasing perfection before you have repeatability is just frustrating.
The other thing worth saying: the beans matter more than the technique at a certain point. You can have flawless pour technique and still produce a mediocre cup if the coffee is mediocre. Invest in freshly roasted beans from a roaster who sources with intention. The technique amplifies what is already in the bean. It cannot create what is not there.
— Stefan
Brew better with Adiracoffee
If you have the technique down, the next upgrade is the coffee itself. Adiracoffee roasts single-origin and signature blends to order in small batches in California, shipping within days of roast. Every bag arrives at peak freshness, which means visible bloom, vibrant aromatics, and a cup that actually rewards your effort.

The Love Blend is a balanced, approachable option that works beautifully across all three major dripper types. For a brighter, more complex cup on the V60, the Colombia single origin delivers clarity and sweetness that pour over technique highlights best. Both are roasted to order, so you are never brewing from a bag that sat in a warehouse for three months. Subscribe for 10% savings and free US shipping over $35.
FAQ
What is the best coffee-to-water ratio for pour over?
The standard starting ratio is 1:16, meaning 1 gram of coffee for every 16 grams of water. For a single cup, that translates to 20 grams of coffee and 320 grams of water.
What grind size should I use for pour over coffee?
Medium-fine is the standard for most pour over drippers, similar in texture to coarse sand. Chemex requires a medium-coarse grind due to its thicker filter, while the V60 works best at medium-fine.
How long should a pour over take to brew?
Total brew time from first pour to complete drawdown should fall between 2:30 and 3:30 minutes for most drippers. If it finishes faster, grind finer. If it takes longer than 3:45, grind coarser.
Why does my pour over taste bitter?
Bitterness signals over-extraction. The most direct fix is to use a coarser grind, which slows extraction rate. You can also lower water temperature slightly, particularly if you are brewing a dark roast.
Do I need to bloom pour over coffee every time?
Yes. Blooming releases CO2 trapped in fresh grounds, which would otherwise create uneven extraction and a flat-tasting cup. Pour 40 to 60 grams of water over the grounds and wait 30 to 45 seconds before continuing.