
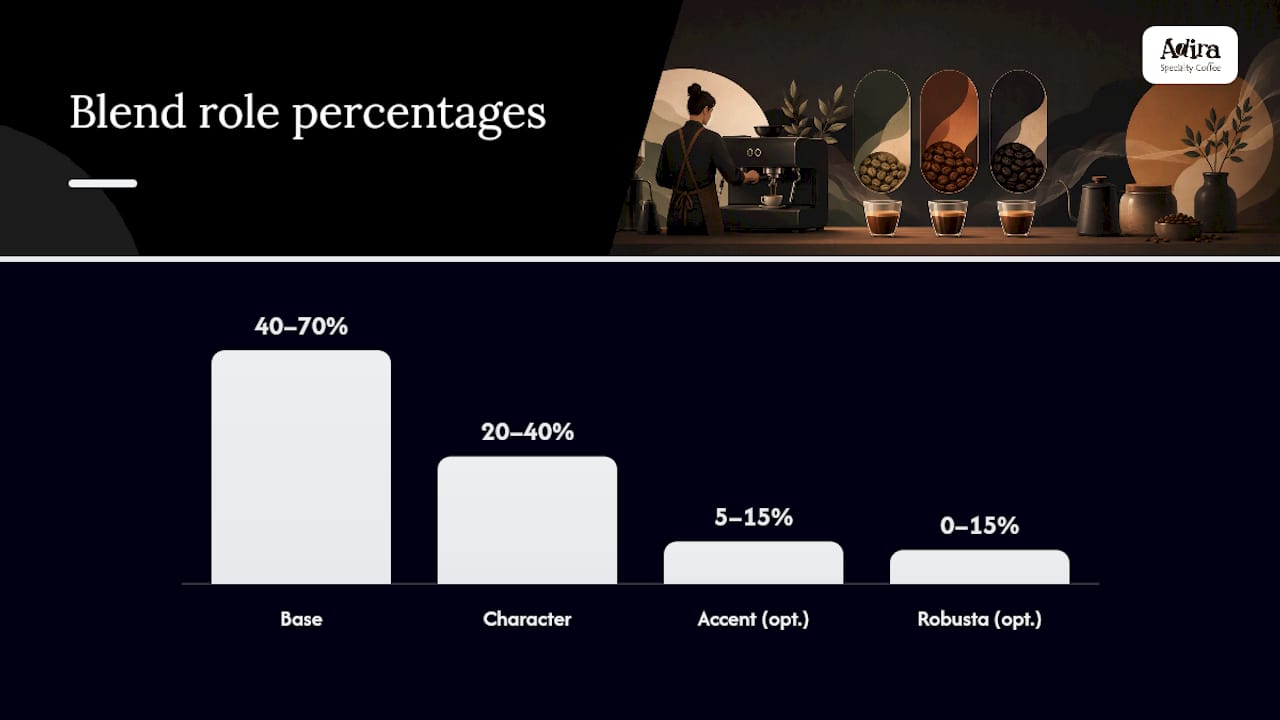
An espresso blend recipe combines two or three coffees at set proportions to hit a specific flavor, body, and crema target under pressure. Most reliable blends lean on a dominant base at 40 to 70 percent, with the rest filled by a brighter or more aromatic component. Start with 50/50 or 70/30, pull it as espresso, and adjust from there.
TL;DR:
- Most espresso blends rely on a dominant base coffee making up 40 to 70 percent of the mixture to ensure consistency and strength.
- Bright or aromatic components should stay under 40 percent of the blend to avoid overly sharp or thin shots, especially in traditional espresso.
- Post-blending roasted beans separately is recommended for better control of each origin’s development, particularly when using beans with different densities.
- Maintaining each component at no less than 15 percent is ideal to ensure consistent dosing and flavor extraction during brewing.
- Re-adjust every time a single component is replaced or changed, treating the whole blend as new to refine extraction and flavor profile.
Table of Contents
- Three Starter Espresso Blend Recipes to Try This Week
- Which Coffees Should Fill Each Role in a Blend?
- Should You Blend Green Beans or Roasted Beans?
- How Do You Test and Document a New Espresso Blend?
- How Do You Re-Dial a Blend After Changing a Component?
- Fixing Common Blend Problems and Testing With Milk
- Adira’s Approach to Small-Batch Blend Development
- A Founder’s Checklist for Building Your First Blend
- Ready-Made Blends for Your Next Espresso Recipe
- Sources
Three Starter Espresso Blend Recipes to Try This Week
You don’t need ten origins and a spreadsheet to build something worth drinking. You need a clear job for each coffee in the cup and a ratio you’re willing to defend after tasting it three times. Here are three starting points, each built around a different priority.
Recipe A: Sweet Chocolate Base (built for milk drinks) Roast both to a medium-dark development, just short of visible oil on the surface. This combination leans heavily on low acidity and heavy body, which is exactly what survives contact with steamed milk. Dial in with a 1:2 ratio (18 grams in, 36 grams out) and expect a shot that reads sweet and syrupy rather than sharp. If you’re substituting from Adira’s lineup, the Adira Blend works as a close stand in for the base role, since it’s built around body and consistency rather than acidity.
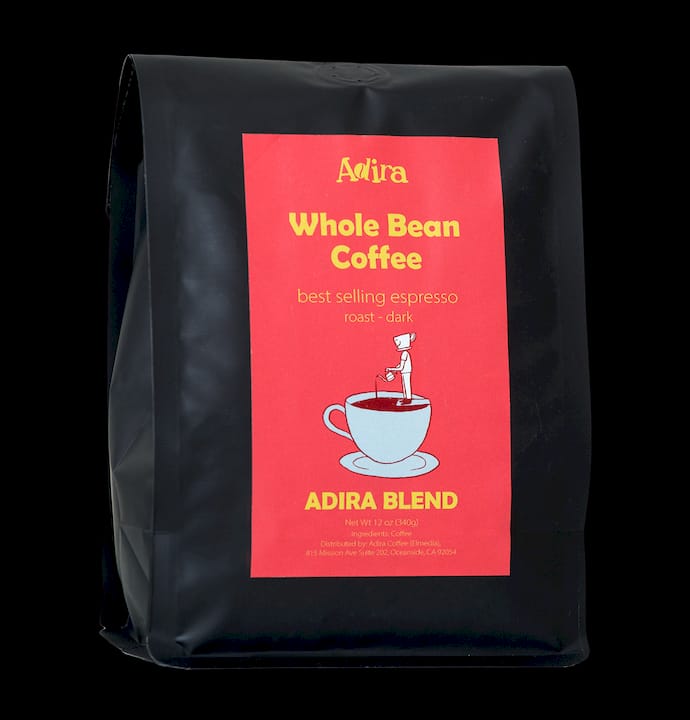
Recipe B: Balanced All-Rounder (works black or with milk) This is the recipe that behaves in almost any brewing context, straight shot or latte, because neither component pushes hard in one direction. Roast to a solid medium. Start dialing at 18 grams in, 36 to 38 grams out, and taste for a shot that’s sweet up front with a short, clean finish. The Love Blend is designed with this kind of versatility in mind, and it’s a reasonable one-bag substitute if you’d rather skip the sourcing step entirely.
Recipe C: Bright Aromatic Accent (best for espresso-forward tasting) This ratio pushes past the usual ceiling for bright components, so it’s meant for people drinking straight shots, not lattes. Roast the base slightly darker than the accent if you’re post-blending, since Ethiopian and Kenyan coffees can turn thin and papery past a medium roast. The African Blend captures a similar citrus-and-floral profile if you want a finished version without roasting the accent yourself.
Pro Tip: Log every ratio change on a sticky note taped to the hopper. It sounds low-tech, but it’s the difference between repeating a good result and wondering what you did three batches ago.
A specification-based development process is what separates a repeatable house blend from a lucky one-off shot. Every recipe above started as a target profile, not a random pairing of coffees that happened to be in the roaster’s bin.
Which Coffees Should Fill Each Role in a Blend?
Every espresso blend needs a coffee doing a specific job, not just a coffee that “tastes good.” Three roles cover almost every recipe you’ll build:
- Base (40 to 70% of the blend): Carries body, sweetness, and low acidity. Brazilian natural or pulped natural coffees and washed Sumatra both do this well, since they hold up under the intensity of espresso pressure without turning harsh.
- Character or brightness component (20 to 40%): Adds the flavor identity people notice, whether that’s berry, citrus, or floral notes. Washed Central American coffees, Kenyan, and washed Ethiopian all work here, but keep bright, acidic components under roughly 40% of the total blend, since espresso concentrates acidity in a way filter brewing doesn’t.
- Accent (5 to 15%, optional): A small addition that rounds out aroma or adds a specific note the base and character components are missing.
Robusta deserves a specific mention here because home baristas either avoid it entirely or overuse it. A small robusta addition, 0 to 15% of the total blend, thickens crema and adds body, but it comes with a flavor and caffeine trade-off that specialty drinkers often notice and dislike. Use it sparingly, if at all, and only to solve a specific crema problem you can’t fix another way.
One more practical rule: keep every component at 15% or higher if you’re mixing at home. Below that threshold, dose-to-dose variability in your grinder and scale means the component’s contribution basically disappears from one shot to the next. Understanding how origin shapes flavor and extraction makes these role assignments much easier to reason through instead of guessing.
Should You Blend Green Beans or Roasted Beans?
Roast the components separately, then combine them after roasting, if you’re serious about consistency. This is called post-blending, and it’s the better default for home roasters working with dissimilar origins.
Pre-blending, mixing green beans together before a single roast, is simpler because you only run one batch. The problem is density. A dense Kenyan and a softer Brazilian absorb heat at different rates, so a single roast profile that’s correct for one component is usually wrong for the other. Post-blending gives you more control over each origin’s development, at the cost of running multiple roast batches and weighing them out separately afterward.
Roast level matters just as much as the blending method. Espresso generally wants a medium to medium-dark development, well short of the point where beans turn visibly oily. Oily, very dark roasts lose the origin character you built into the blend in the first place, and they extract inconsistently because the surface sugars have already caramelized past their peak. Lighter roasts, on the other hand, often struggle to produce crema and can taste sour or grassy under pressure.
If your components have different densities, here’s a quick way to harmonize them:
- Roast the denser component slightly longer or hotter to match development.
- Roast the softer component with a gentler curve to avoid scorching before full development.
- Cup both as espresso, not filter, once cooled and rested for at least 24 hours.
- Compare crema color and persistence side by side before committing to the final blend ratio.
Pro Tip: If one component consistently pulls faster than the other at the same grind setting, that’s a density mismatch talking. Adjust roast development before you touch the grinder.
How Do You Test and Document a New Espresso Blend?
Write the target profile down before you touch a single bean. A specification might read: “medium body, dark chocolate and orange notes, holds up in milk, extracts in 27 to 30 seconds at a 1:2 ratio.” That sentence becomes your test against every ratio you try afterward.
Once you have candidates for base, character, and accent, cup each one as espresso, not filter. Filter cupping tells you almost nothing about how a coffee behaves under nine bars of pressure, because espresso emulsifies oils and concentrates body in a way that pour-over simply doesn’t replicate. Pull single-origin shots of each candidate and record body, crema texture and how long it lasts, and the aftertaste that lingers after swallowing.
From there, build a small test matrix:
- Start with two straightforward hypotheses like 50/50 and 70/30.
- Move ratios in 10 to 25% increments between tests. Anything smaller than 10% usually falls below what your palate can reliably detect.
- Blind taste each version against your written specification, ideally with a second taster.
- Repeat the winning ratio across at least two different days and, if possible, two different machines, to confirm it wasn’t a lucky pull.
Document the final recipe with roast dates, exact weights, and grind settings the moment you land on something worth repeating. A blend you can’t reproduce next month isn’t a recipe, it’s a memory.
How Do You Re-Dial a Blend After Changing a Component?
Swap one coffee in a blend and treat the whole recipe as new.
Work through the dial-in in order:
- Set your dose first. Most home espresso machines work well with 18 to 20 grams in an 18 gram basket.
- Adjust grind to hit your target time. Aim for 25 to 32 seconds for most espresso blends, adjusting finer if the shot runs fast.
- Lock in your yield ratio. A 1:2 ratio (18 grams in, 36 grams out) is a solid starting point for most blends; drop to 1:1.5 for a more concentrated, syrupy shot.
- Taste before you trust the numbers. A shot that hits 28 seconds and 1:2 but tastes hollow or sharp still needs adjustment, regardless of what the clock says.
Judge crema by color and persistence, not just thickness. A blend with good base coffee selection produces crema that holds for a minute or more and looks tawny brown rather than pale or gray. Body should coat the tongue without feeling thin or watery, and the finish should match whatever your original specification called for.
Fixing Common Blend Problems and Testing With Milk
Most bad shots trace back to one of two problems: under-extraction or over-extraction. A sour, sharp shot usually means the grind is too coarse, the dose is too low, or the yield ran too fast. Tighten the grind, and if that doesn’t fix it, extend the shot time slightly. A bitter, harsh shot points the other way. Coarsen the grind or reduce the yield time.
If a shot lacks body or crema, resist the urge to reach for robusta immediately. A small robusta addition remains an option if that doesn’t get you there, but treat it as a last resort rather than a default fix.
- Sour or sharp: grind finer, or extend extraction time slightly.
- Bitter or harsh: grind coarser, or shorten extraction time.
- Weak crema or thin body: raise base percentage by 10% before adding robusta.
If the blend’s real destination is a latte or flat white, test it that way during development, not just as a straight shot. A blend that tastes balanced on its own can turn flat or overly sharp once milk is added, because sweetness and acidity read differently once diluted and heated.
Pro Tip: Pull the exact same dose as a straight shot and as a milk drink side by side. If one tastes noticeably better than the other, your blend still needs a ratio adjustment, not a milk-steaming fix.
Adira’s Approach to Small-Batch Blend Development
Every good blend starts the same way most good home recipes should: with a target profile written before a single bean gets roasted. Roasting in small batches and shipping quickly matters because a blend’s balance depends on fresh, consistent development, not just the right ratio on paper.
If you’re building the recipes above and want a shortcut on any single role, the Adira Blend Creator page walks through how Adira composes its own house blends. The Adira Blend suits the base role in Recipe B, Love Blend slots naturally into milk-forward recipes like Recipe A, and African Blend covers the bright, espresso-forward profile in Recipe C.
For subscribers who want to test blends this week rather than after a roasting session, order a sample of each and pull them as straight shots first, then in milk, before deciding which one becomes your house blend.
A Founder’s Checklist for Building Your First Blend
Keep it to two components before you ever reach for a third. Most of the balance problems home baristas fight come from stacking origins instead of nailing a simple ratio first. Cup every candidate as espresso, never just filter, because that’s the only way to know how a coffee actually behaves under pressure. Write down every change, no matter how small it feels in the moment.
Test milk performance early, not as an afterthought once you already like the shot black. Your palate won’t reliably catch the difference, and you’ll waste roasting time chasing noise instead of signal. Any time you swap a component, treat the whole recipe as new and re-dial your extraction from scratch.
— Stefan
Ready-Made Blends for Your Next Espresso Recipe
If you’d rather skip the trial batches and start pulling shots today, Adiracoffee’s three signature blends map directly onto the recipes above. African Blend brings the bright, aromatic profile Recipe C calls for. Love Blend covers the balanced, milk-friendly role from Recipe B. And Adira Blend delivers the sweet, chocolatey base that anchors Recipe A.
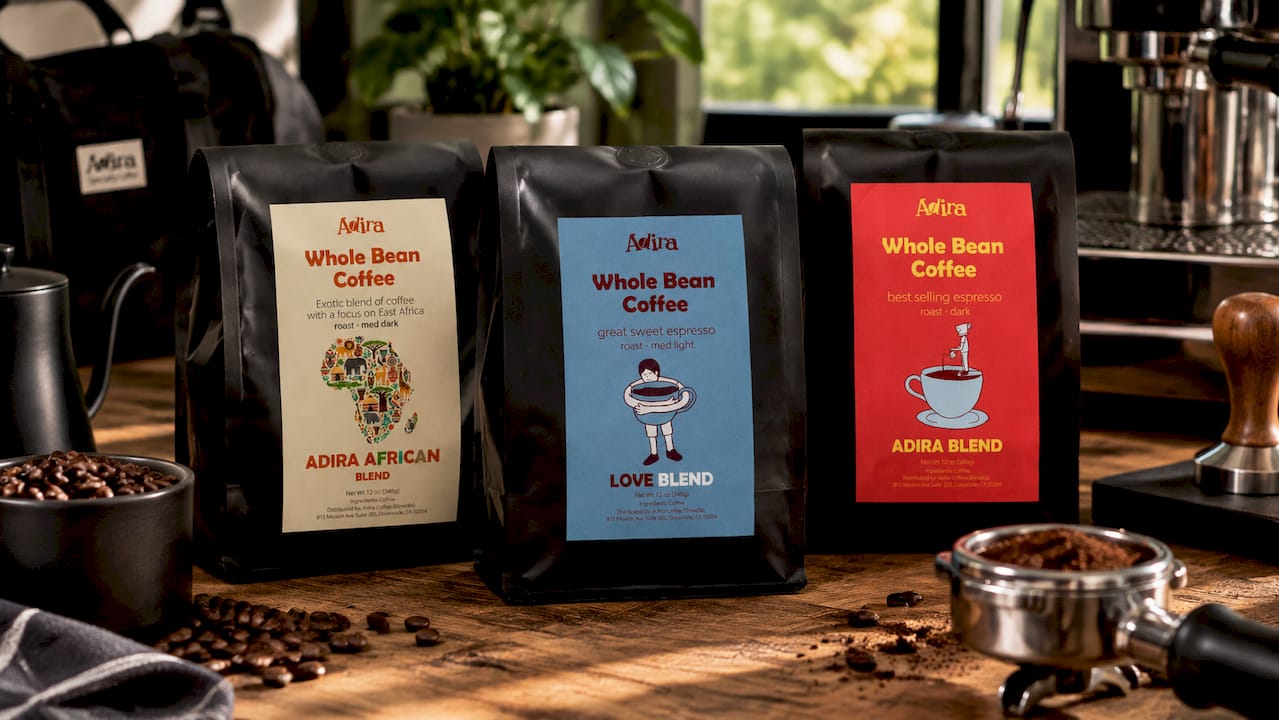
Freshly roasted coffee is shipped promptly so you’re testing fresh coffee instead of whatever’s been sitting on a supermarket shelf for months.
Order a sample of all three blends, pull each one as a straight shot this week, then run the same shot through milk before you decide which becomes your house recipe. Head to the Adira Blend product page to start your first order.
Sources
- How to Build an Espresso Blend — Perfect Daily Grind
- Espresso blending principles — CoffeeResearch
- Blending Basics — Sweet Maria’s Library