
TL;DR:
- Cleaning a coffee grinder removes oils and residue to preserve flavor and grind quality. Regular wiping, brushing, vacuuming, and deep cleaning every 2–3 months ensure consistent performance and prevent stale-tasting grounds. Avoid using rice or water, and always clear the exit chute weekly to maintain optimal flavor.
Cleaning a coffee grinder is the practice of removing accumulated coffee oils, fine grounds, and residue from burrs, chambers, and chutes to preserve grind quality and flavor clarity. A dirty grinder does not just taste bad. It actively degrades every cup you brew by introducing rancid oils and stale particles into fresh grounds. Industry guides recommend daily wiping, weekly brushing, and a full deep clean every 2–3 months. Knowing how to clean a coffee grinder properly means understanding which tools are safe, which shortcuts cause damage, and why specialized cleaning tablets like Urnex Grindz exist in the first place.
What tools and supplies do you need?
The right supplies make grinder maintenance fast and safe. The wrong ones cause real damage, and the most common offender is uncooked rice.
Here is what you need before you start:
- Stiff nylon brush or toothbrush. Burrs made of hardened steel or ceramic require firm bristles to dislodge compacted oils. The soft brush that came with your grinder probably is not stiff enough for a thorough job.
- Microfiber cloth. Use it dry for wiping external surfaces and the hopper. Never use a wet cloth near burrs or internal components.
- Vacuum with a narrow attachment. A narrow vacuum attachment reaches deep into the burr chamber and exit chute far better than a brush alone.
- Grinder cleaning tablets. Urnex Grindz is the most widely used option. These tablets cost roughly $14–18 and last 6–12 months. They absorb oils, pull out fine particles, and exit the grinder as a powder you simply discard.
- Unfolded paperclip. The exit chute collects compressed fines that neither a brush nor a vacuum can dislodge. A stiff paperclip clears the chute without scratching internal surfaces.
What to avoid: Never use vinegar, acidic cleaners, or water on burrs or internal electrical parts. Water contact with steel burrs causes rust, and moisture near the motor leads to failure. Wash only removable plastic parts that your grinder’s manual explicitly marks as dishwasher or water safe, and dry them completely before reassembly.
Pro Tip: Skip the rice. Uncooked rice is harder than coffee beans and chips ceramic burrs. Urnex Grindz does the same job without the risk.
How to keep your grinder clean day to day
Consistent small habits prevent the kind of buildup that requires a full teardown. Think of daily and weekly care the way Serious Eats describes it: routine cleaning is like brushing teeth, and deep cleaning is the dental visit.
Daily routine (under 2 minutes)
- Wipe the hopper and lid with a dry microfiber cloth after each grinding session.
- Brush any visible grounds off the exterior with a dry stiff brush.
- Run a quick visual check of the exit chute opening for any visible buildup.
Weekly routine (5–10 minutes)
- Remove the hopper and set it aside.
- Use a stiff nylon brush to sweep the upper burr and the area around the burr carrier.
- Vacuum the burr chamber with a narrow attachment to pull out fine particles the brush loosened.
- Clear the exit chute with an unfolded paperclip. Compressed fines accumulate in the chute and are the primary source of stale grounds in your cup.
- Wipe all external surfaces with a dry microfiber cloth.
- Reassemble and run a small dose of fresh beans to purge any remaining loose particles.
Pro Tip: Tie your weekly grinder brush to a habit you already have, like your Sunday morning brew ritual. Consistency beats intensity every time.
How to deep clean your coffee grinder step by step
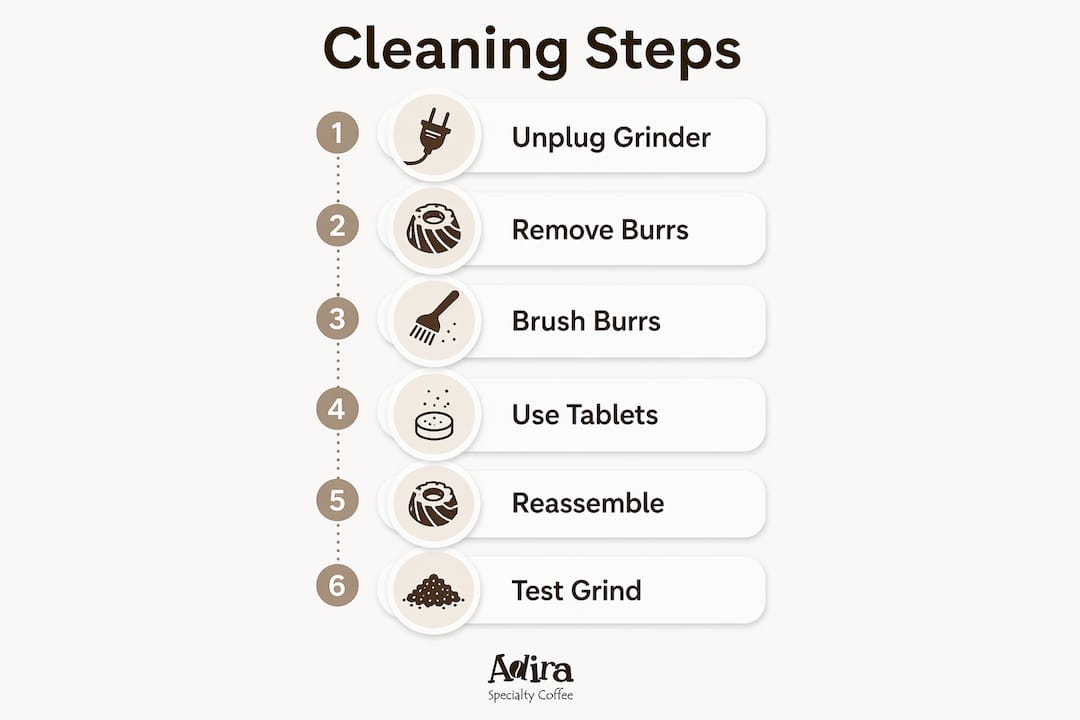
A deep clean every 2–3 months restores your grinder to near-new performance. This is where most home baristas make mistakes, so take your time with each step.
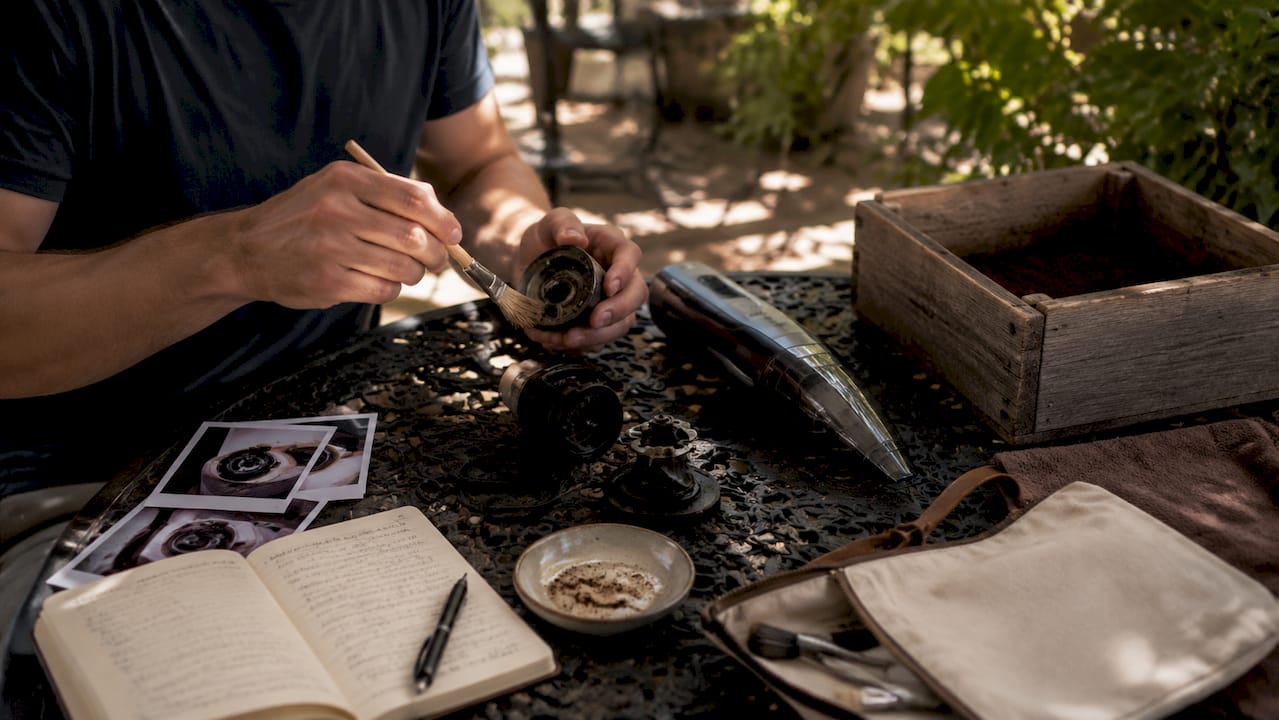
Before you start
Unplug the grinder. Empty the hopper completely. Set up a clean, well-lit workspace with a towel to catch small parts. Then take photos of the grinder from multiple angles before touching anything. Photos during disassembly prevent the most common reassembly errors, especially with springs, adjustment collars, and burr carriers that look identical from both sides.
Disassembly
- Remove the hopper and set it aside.
- Lift out the upper burr. Most burrs twist counterclockwise to release. Check your manual if yours differs.
- Remove any other detachable components your manual identifies, such as the burr carrier or grounds bin.
- Lay all parts on the towel in the order you removed them.
Cleaning each component
- Burrs. Use a stiff nylon brush to scrub both the upper and lower burr surfaces. Work in small circular motions to dislodge compacted oils. Do not rinse burrs with water.
- Burr chamber. Vacuum with a narrow attachment first, then follow with a brush to loosen anything the vacuum missed. The technical design of espresso grinder burr carriers traps fine grounds in areas that require manual attention beyond vacuuming alone.
- Exit chute. Use the paperclip to clear any packed grounds. Follow with the vacuum.
- Hopper and grounds bin. Wash with warm soapy water only if your manual confirms they are water safe. Dry completely before reassembly.
Using cleaning tablets
Run Urnex Grindz tablets according to the package directions before reassembly. The standard method is to run the tablets through the grinder, then follow with approximately 30 grams of fresh beans to purge tablet residue. This re-seasons the burrs and clears any remaining powder.
| Component | Cleaning method | What to avoid |
|---|---|---|
| Burrs | Stiff nylon brush, dry only | Water, vinegar, acidic cleaners |
| Burr chamber | Vacuum then brush | Compressed air indoors (scatters fines) |
| Exit chute | Paperclip then vacuum | Skipping this step entirely |
| Hopper | Warm soapy water if water safe | Reassembling while damp |
| Grounds bin | Warm soapy water if water safe | Dishwasher unless manual confirms safe |
Reassembly and purge
Refer to your photos. Seat the lower burr first, then align the upper burr carefully. Misaligned burrs produce uneven particle sizes and a noticeably flat cup. After reassembly, run fresh beans through the grinder to purge residues and re-season the burrs before your next real brew.
Pro Tip: After reassembly, grind a small amount and check the grounds texture. If the particle size looks inconsistent or the grinder sounds different, the burrs may not be seated correctly. Disassemble and reseat before grinding a full dose.
Common mistakes that damage grinders or ruin flavor
Most grinder problems trace back to a short list of avoidable errors. Knowing them saves you money and frustration.
- Using rice as a cleaning agent. Rice is harder than coffee beans. It chips ceramic burrs and strains the motor. Urnex Grindz exists specifically because rice is not a safe substitute.
- Getting water on burrs or internal parts. Steel burrs rust when exposed to moisture, and water near the motor causes failure. Dry cleaning is the rule for everything internal.
- Ignoring the exit chute. The chute is the most overlooked part of any grinder. Packed fines here go stale fast and contaminate every batch that follows.
- Grinding flavored or oily beans without a dedicated grinder. Flavored coffee oils are extremely difficult to remove and will affect every subsequent batch. If you brew flavored beans regularly, use a separate grinder.
- Skipping burr replacement. Burrs wear out. The general threshold is 500–1,000 lbs of coffee processed. Dull burrs produce inconsistent particle sizes regardless of how clean the grinder is.
Neglecting the exit chute is the single most common reason home baristas taste staleness in a freshly cleaned grinder. Clear it every week without exception.
For more on eliminating oily residues that affect flavor, the Adiracoffee blog covers grinder technique in depth.
Key takeaways
Consistent grinder maintenance, combining daily wiping, weekly brushing, and a deep clean every 2–3 months, is the most reliable way to protect flavor clarity and extend the life of your equipment.
| Point | Details |
|---|---|
| Clean on a schedule | Deep clean every 2–3 months; brush and vacuum weekly; wipe daily. |
| Use the right tools | Stiff nylon brush, narrow vacuum attachment, and Urnex Grindz tablets. |
| Never use water on burrs | Steel burrs rust and motors fail when exposed to moisture. |
| Clear the exit chute weekly | Packed fines in the chute are the top cause of stale-tasting grounds. |
| Purge after every deep clean | Run 30 grams of fresh beans after reassembly to re-season burrs and clear residue. |
Why I clean my grinder more often than most guides suggest
Most cleaning guides treat the deep clean as the main event. I disagree. The weekly brush and chute clear are what actually protect your cup day to day. By the time you need a full teardown, the damage to flavor has already been accumulating for weeks.
The photo tip during disassembly is not optional for me. I learned this the hard way after spending 20 minutes trying to remember which direction a burr carrier seated. One photo from above and one from the side takes 10 seconds and saves real frustration. Proper disassembly with photo documentation avoids time-consuming errors and potential grinder damage, and I have seen that play out firsthand.
The flavored bean issue is also underestimated. I keep a separate grinder for anything with added flavoring. The oils from flavored beans bond to burr surfaces in a way that no tablet fully removes. Your regular single-origin or specialty blend deserves a clean slate every time.
The bigger picture is this: a clean grinder makes good coffee taste the way it was roasted to taste. At Adiracoffee, we put real effort into sourcing and roasting every batch. A dirty grinder is the fastest way to undo that work before the water even hits the grounds.
— Stefan
Fresh coffee deserves a clean grinder
A clean grinder is the foundation of every great cup. Once your maintenance routine is in place, the next step is making sure the coffee going through it is worth the effort.

Adiracoffee roasts single-origin and signature blends in small batches in California and ships them within days of roasting. Every bag arrives at peak freshness, ready to show what a well-maintained grinder can actually do. The Mushroom Coffee Medium Roast and the Love Blend are two of the most popular options for home baristas who want clean, clear flavor in every brew. Free US shipping on orders over $35, with a subscription option that saves 10%.
FAQ
How often should I clean my coffee grinder?
Daily wiping, weekly vacuuming and brushing, and a full deep clean every 2–3 months is the standard recommendation for home grinders.
Can I use rice to clean a burr grinder?
No. Uncooked rice is harder than coffee beans and chips ceramic burrs while straining the motor. Use specialized grinder cleaning tablets like Urnex Grindz instead.
What is the best way to clean coffee grinder burrs?
Scrub burrs with a stiff nylon brush using small circular motions, then vacuum the chamber with a narrow attachment. Never use water, vinegar, or any liquid on burrs or internal components.
How do I know when my burrs need replacing?
Burrs typically need replacement after processing 500–1,000 lbs of coffee. Signs include noticeably inconsistent grind texture or a flat, muddy flavor that cleaning does not fix.
Why does my coffee still taste stale after cleaning?
The exit chute is the most likely culprit. Compressed fines pack into the chute and go stale quickly. Clear it with an unfolded paperclip every week, not just during deep cleans.