
TL;DR:
- Inconsistent coffee taste results mainly from poor grinding workflow, not bean quality or the machine.
- Implementing a systematic process—including proper setup, precise adjustments, and retention control—improves extraction and flavor consistency.
If your shots taste sour one day and bitter the next, the culprit is almost always your coffee grinding workflow. Not your beans, not your machine. Inconsistent grind size, static clinging to your portafilter, and retained stale grounds are three problems every home barista faces, and they all trace back to the same root: grinding without a system. This guide gives you that system. You’ll learn exactly how to set up your grinder, dial in with precision, manage retention, and troubleshoot the mistakes that silently ruin your cup.
Table of Contents
- Key Takeaways
- Your coffee grinding workflow starts with the right setup
- Step-by-step grinding workflow for espresso and filter coffee
- Managing retention and static for a cleaner workflow
- Common grinding workflow mistakes to fix right now
- My take on workflow discipline in home brewing
- Start with better beans to make your workflow count
- FAQ
Key Takeaways
| Point | Details |
|---|---|
| Dial in one variable at a time | Adjust only grind size per shot to accurately diagnose extraction issues and avoid confusion. |
| Use RDT to fight static | Adding a single mist of water before grinding cuts clumping and improves dose accuracy measurably. |
| Purge after grind adjustments | Discard 2 to 3 grams after changing grind size to flush retained stale grounds from the previous setting. |
| Treat grinding as a connected workflow | Grinding, dosing, and puck prep work together. Optimizing one step while ignoring another costs you flavor. |
| Record your results every session | Logging dose, yield, grind setting, and shot time builds a personal reference that speeds future dial-ins. |
Your coffee grinding workflow starts with the right setup
Before you grind a single gram, your equipment and workspace need to be ready. The grinder itself is the most consequential tool in your coffee preparation techniques, and grinder type matters enormously. Burr grinders, both flat burr and conical burr styles, produce a far more uniform particle size than blade grinders. Flat burrs tend to run hotter and produce a bimodal distribution that many baristas prefer for espresso. Conical burrs run cooler and retain fewer fines, which suits filter brewing well. Neither is universally better. What matters is that you know what you are working with.
Beyond the grinder, a precision scale accurate to 0.1 grams is non-negotiable. You need one under your portafilter and ideally one for weighing beans before they go in. Dosing rings or cups help funnel grounds cleanly and reduce mess. A WDT (Weiss Distribution Technique) tool, which looks like a needle whisk, is inexpensive and dramatically improves puck consistency. A small spray bottle is your static weapon, and a bellows helps push retained grounds out of the chute.
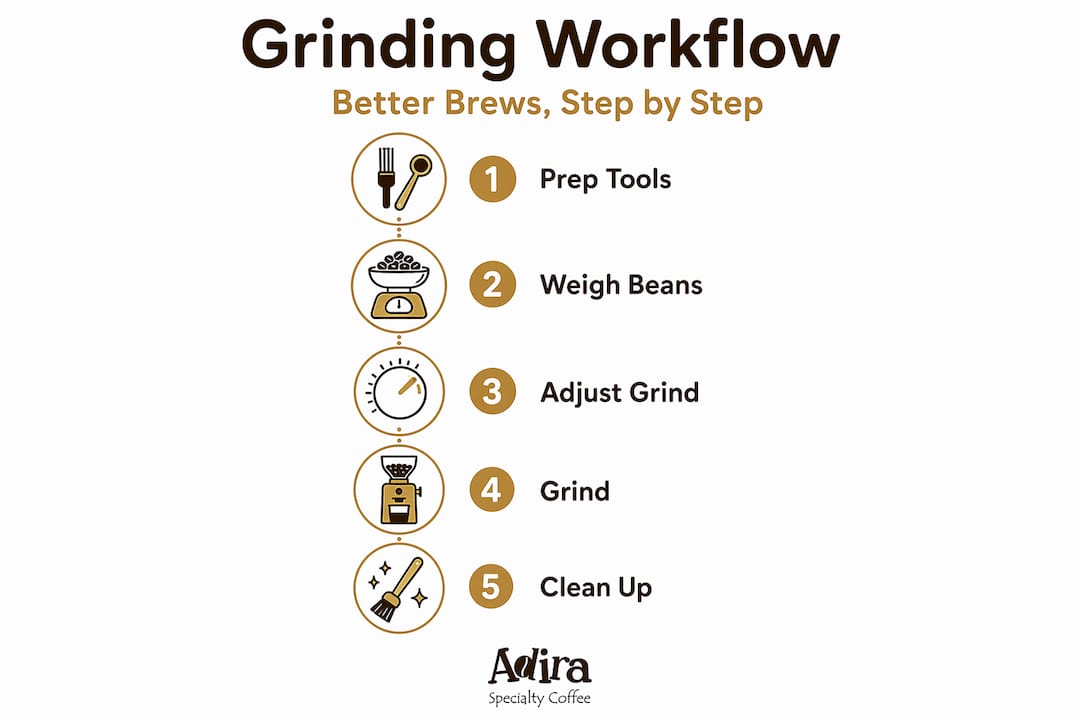
Pro Tip: Keep a small notebook or use your phone to record grind settings. When you switch beans or hit a workflow issue, you’ll want a reference point that took you ten minutes to earn, not ten shots.
Here is a quick comparison of key grinder accessories and what they actually do:
| Tool | Purpose | Impact on workflow |
|---|---|---|
| Precision scale (0.1g) | Accurate dose measurement | Prevents over/under-dosing per shot |
| WDT tool | Breaks up clumps in the puck | Reduces channeling, improves extraction evenness |
| Spray bottle (RDT) | Adds micro-moisture to beans | Cuts static, reduces clumping in chute |
| Bellows | Pushes retained grounds out | Lowers stale retention between shots |
| Dosing ring or cup | Contains grounds during transfer | Reduces mess and dose loss |
Environmental factors matter too. High humidity can cause grounds to clump even without static. Low humidity makes static worse. If you live somewhere with extreme humidity swings, storing beans and grinding promptly after dosing keeps variables tighter. Cleaning your grinder burrs regularly prevents oil buildup that causes clumping and stale flavor bleed.
Step-by-step grinding workflow for espresso and filter coffee
A repeatable coffee grinding process is what separates a great shot from a lucky one. Here is a step-by-step workflow designed to work for both espresso and filter brewing, with the dial-in logic you can apply to any setup.
-
Set your starting parameters. For espresso, the standard starting point is 18g dose in, 36g yield out at a 1:2 ratio, targeting 25 to 30 seconds extraction time. For filter methods like pour-over, start with a 1:15 or 1:17 coffee-to-water ratio and a medium grind.
-
Grind and weigh your dose. Grind directly onto your scale or into a dosing cup. Confirm the dose weight before transferring. Consistency here prevents you from chasing grind problems that are actually dosing errors.
-
Apply WDT. Use your WDT tool to stir the grounds inside the portafilter basket in slow, even circles. WDT breaks up clumps and creates a uniform bed density, which is what actually prevents channeling.
-
Distribute and tamp evenly. Level the surface with a distributor or gentle tap. Tamp with straight, level pressure. An angled tamp creates uneven density, and water will always find the path of least resistance.
-
Pull your shot and record the result. Time from first drop to target yield. If your shot runs short (under 25 seconds), your grind is too coarse. If it runs long (over 35 seconds), it is too fine.
-
Adjust grind size by one increment only. Adjusting one click at a time produces a predictable change of 3 to 7 seconds in shot time. Large jumps make it impossible to know what caused the shift.
-
Purge before pulling the next shot. After any grind adjustment, purge 2 to 3 grams of coffee into a discard cup. Retained grounds from the previous setting would otherwise contaminate your new shot and skew your data.
-
Lock in your recipe. Once your shot lands in the 25 to 30 second window with good flavor, write down your grind setting, dose, yield, temperature, and shot time. That record becomes your baseline.
Pro Tip: When switching to a new bag of beans, even from the same origin, dial in fresh. Roast date, moisture content, and density vary between batches, and your previous setting may be off by two or three clicks.
For filter coffee brewing, optimizing your filter coffee workflow follows the same logic. Adjust grind coarseness one step at a time, taste between brews, and note what changed. The principle is identical: one variable, one adjustment, one conclusion.
Managing retention and static for a cleaner workflow
Retention and static control are the two workflow elements home baristas most often overlook, yet they quietly destroy dose accuracy and cleanliness every single session.
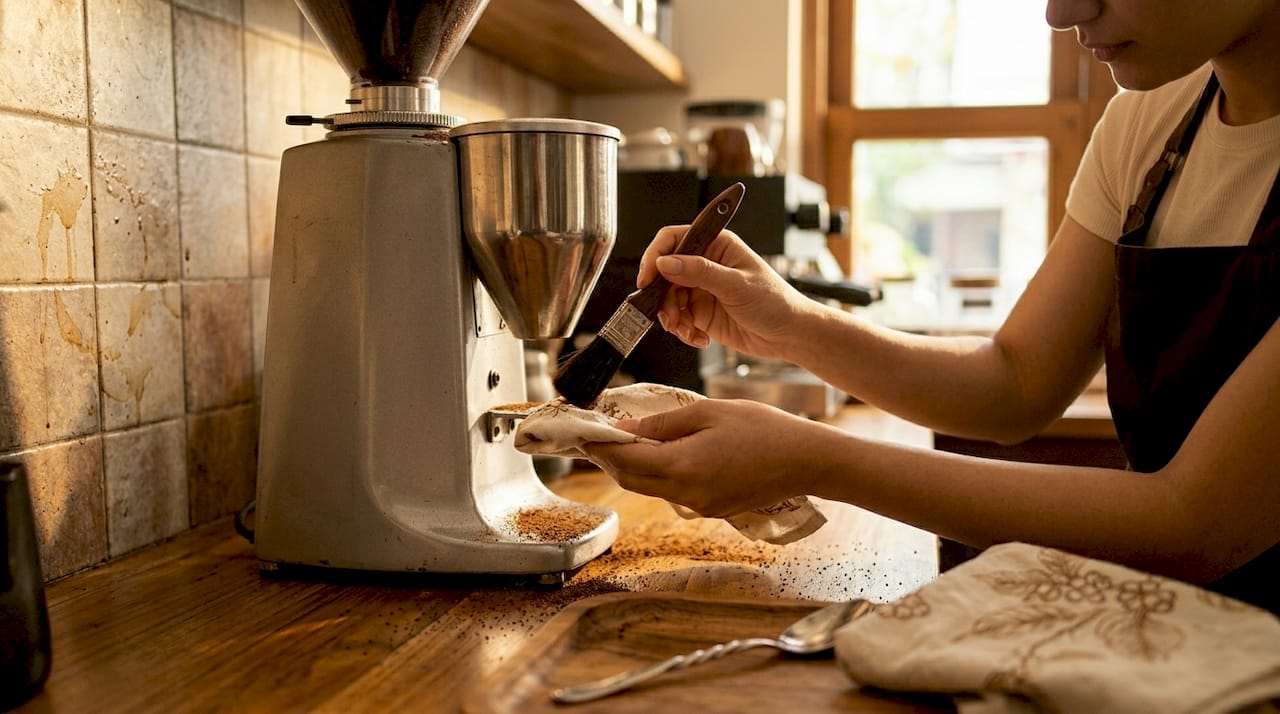
Grind retention refers to the grounds that stay inside your grinder after it stops. In single dosing setups, retained grounds from a previous grind mix with fresh ones in the next session. That means stale coffee enters your portafilter without you knowing it. Even a modest 0.8 gram retention will skew your shot if your dose target is 18 grams. Tools like bellows and tilted grinder bases address this directly. One well-documented workflow with the Eureka Mignon cuts retention from approximately 0.8g to 0.1g using a bellows and tilted base setup.
Static is a separate but related problem. When dry grounds exit a grinder at speed, friction builds a static charge that causes grounds to cling to chute walls, portafilter edges, and your countertop. The Ross Droplet Technique (RDT) is the most practical fix available to home baristas. You add a single fine mist of water to your beans before dropping them into the hopper. That micro-moisture raises electrical conductivity and dissipates the static charge before grinding begins.
A layered approach works best:
- RDT before grinding: One spray, mix beans briefly, grind. Adds about 5 seconds to your workflow.
- WDT after grinding: Stir the puck with your needle tool to break any remaining clumps. Adds 15 to 20 seconds.
- Monthly burr cleaning: Stale oils and fine particle buildup are a major source of clumping that no amount of RDT will fix. Combining RDT, WDT, and cleaning produces consistently cleaner grinds and better extraction over time.
- Bellows after each grind: A quick puff flushes retained grounds out of the chute and into your portafilter where they belong.
These steps together take under two minutes and make a measurable difference in the cleanliness and accuracy of your grinder setup.
Common grinding workflow mistakes to fix right now
Even experienced home baristas repeat certain mistakes that make good results harder to achieve. Knowing what they are lets you skip weeks of frustration.
-
Changing multiple variables at once. If you adjust both grind size and dose in the same session, you cannot tell which change affected the shot. Adjusting one variable per shot is the only way to diagnose accurately. This applies to temperature adjustments too. Pick one, test it, then move to the next.
-
Skipping the purge after adjustments. Many home baristas dial their grinder finer or coarser and pull the next shot without purging. The retained grounds from the old setting contaminate the new one, making the shot taste wrong for reasons that have nothing to do with the new setting.
-
Blaming grind size for channeling. If your puck prep is inconsistent, water will channel through weak spots in the coffee bed regardless of how dialed your grind is. A shot that flows fast and produces a blond stream early is not always a coarse grind issue. It might be uneven tamping or poor WDT, which creates uneven bed density.
-
Grinding too far in advance. Ground coffee degasses rapidly. Grinding 10 minutes before brewing causes measurable flavor loss compared to grinding and brewing immediately. Your coffee grinding process should end right before brewing begins.
-
Rushing the dial-in process. Patience pays off here. Pulling three shots in three minutes without tasting carefully or recording results wastes beans and teaches you nothing. Slow down, taste each shot, note what changed, and make one deliberate move.
The best grind size you can achieve means little if these workflow errors cancel it out. Fix the process, and the results follow.
My take on workflow discipline in home brewing
I’ve been working with specialty coffee long enough to know that the grinders and beans matter far less than most people think. What actually separates a frustrating home setup from one that produces repeatable, great coffee is discipline in the workflow itself.
The temptation to change two or three things at once is real, especially when a shot tastes off and you want a fast fix. I’ve done it. It makes everything worse. When I started treating each shot as a single data point in a controlled experiment, my dial-in time dropped from 20 shots to 6 or 7. That’s not just about saving beans. It’s about understanding what you’re actually tasting.
What I don’t see discussed enough is the connection between grinding, extraction, and preparation as one system rather than three separate steps. If you’re obsessing over grind size while ignoring puck prep, you’re solving half the problem. They interact. A well-dialed grind size combined with sloppy distribution will still channel. A perfectly prepped puck with a coarse grind will still extract unevenly.
Workflow, at its best, is part habit and part craft. Balancing grinder precision with dosing speed is something even professional baristas spend years refining. For home baristas, the goal is not professional speed. It is professional repeatability. Build the habit, record your results, and trust the process.
— Stefan
Start with better beans to make your workflow count
A dialed-in coffee grinding workflow only delivers its best results when the beans themselves are fresh and worth dialing in. At Adiracoffee, every bag is small-batch roasted and shipped at peak freshness from farms across Colombia, Ethiopia, Costa Rica, and beyond. If you’re not sure where to start, explore our single origin coffee collection to find beans matched to your brew method and taste preference. You can also browse by roast level to narrow down options that suit your espresso or filter setup. Fresh, ethically sourced beans are the foundation everything else is built on.
FAQ
What is the best grind size for espresso workflow?
The best starting point for espresso is a fine grind that produces a 25 to 30 second shot at an 18g dose in and 36g yield out. Adjust one click at a time until the shot falls within that window.
How often should I clean my grinder?
Monthly cleaning of the burrs removes oil and fine particle buildup that causes clumping and flavor contamination. Daily workflow steps like RDT and bellows use help maintain cleanliness between deep cleans.
What is the Ross Droplet Technique (RDT) and does it work?
RDT involves adding a single fine mist of water to beans before grinding to reduce static charge. It works by raising the electrical conductivity of the beans, preventing grounds from clinging to chute walls and portafilter edges.
Why do I need to purge after adjusting grind size?
Retained grounds from your previous grind setting sit inside the grinder and contaminate the next dose. Purging 2 to 3 grams after any adjustment flushes those stale grounds out before your next shot.
How do I know if my shot problem is grind size or puck prep?
If your shot channels or flows unevenly despite a consistent grind setting, the issue is likely puck preparation. Check your WDT technique and tamp levelness before making any grind size adjustments.
Recommended
- Unlock better flavor: top coffee grinder tips for home baristas – Adira Coffee US
- Why coffee grind size matters for better brews at home – Adira Coffee US
- Expert coffee brewing tips for better flavor at home – Adira Coffee US
- Perfect your filter coffee workflow: a step-by-step guide – Adira Coffee US