
TL;DR:
- Frothing milk involves aerating warmed milk to create a smooth foam that enhances coffee.
- Different tools, like steam wands and French presses, influence foam quality and ease of use.
Frothing milk is defined as aerating warmed milk to create a smooth, creamy foam that transforms a basic cup of coffee into a latte or cappuccino. The process works by trapping air bubbles inside the milk’s protein structure, giving the foam its body and texture. You do not need a commercial espresso machine to get good results. A handheld frother, a French press, or even a jar with a lid can produce foam worth drinking. This guide covers every major milk frothing technique, the right temperatures, and the fixes for the most common mistakes home coffee drinkers make.
How to froth milk at home: tools you need first
The right tool determines your foam quality before you touch a drop of milk. Each device works differently, and knowing what each one produces helps you pick the right method for your drink.
- Steam wand: Built into espresso machines. Produces true microfoam, the silky, pourable texture required for latte art. The highest quality output of any method.
- Handheld electric frother: A battery-powered whisk you hold in the milk. Affordable, fast, and easy to clean. Produces stable foam but not true microfoam.
- French press: A manual method that uses the plunger to pump air into milk. No electricity needed. Works well for cappuccino-style foam.
- Jar with a lid: The simplest DIY milk frothing method. Shake warmed milk in a sealed jar for 30–60 seconds. Produces light, airy foam.
- Whisk: Whisking vigorously by hand aerates milk slowly. Takes more effort but requires zero equipment beyond what most kitchens already have.
| Tool | Cost | Ease of use | Foam quality |
|---|---|---|---|
| Steam wand | High | Moderate | Microfoam (best) |
| Handheld frother | Low | Easy | Stable foam |
| French press | Low | Easy | Cappuccino foam |
| Jar method | None | Very easy | Light, airy foam |
| Whisk | None | Moderate | Basic foam |
Milk type matters as much as the tool. Whole dairy milk froths the most reliably because its fat and protein content supports stable bubbles. Plant-based milks often deflate faster and require shorter frothing times to prevent the foam from collapsing. Oat milk is the most forgiving plant-based option, but over-pumping it in a French press will deflate the foam quickly.
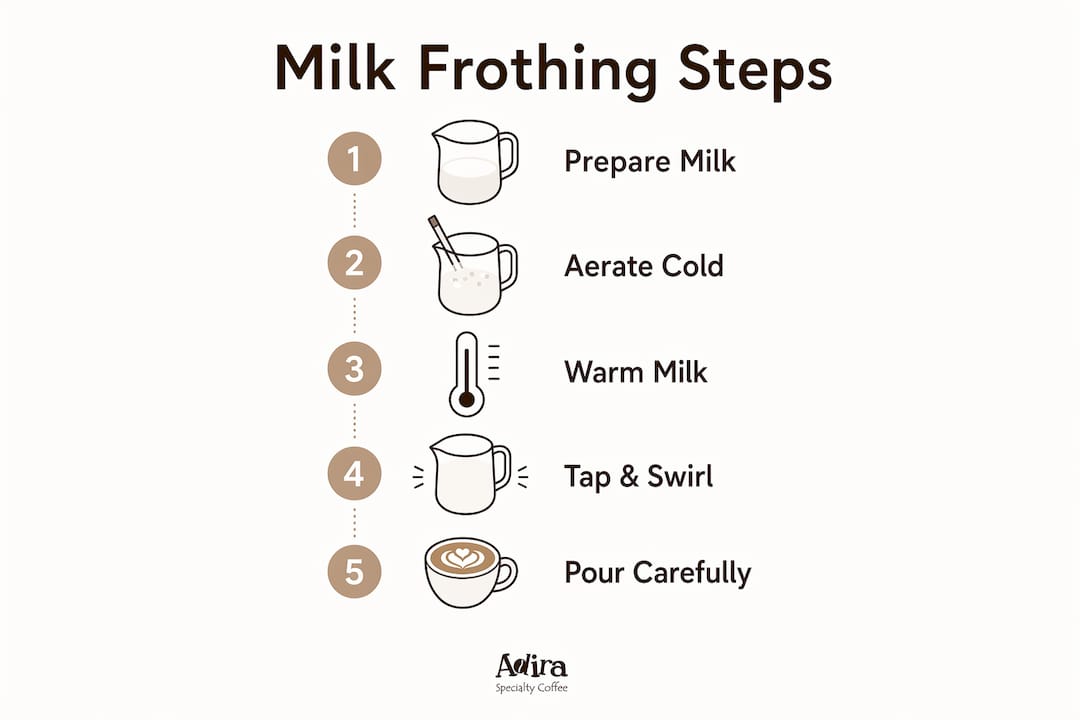
Pro Tip: Cold milk froths better than warm milk at the start. Begin with refrigerator-cold milk and let the frothing process heat it. Starting with already-warm milk produces larger, less stable bubbles.
Step-by-step methods for frothing milk
Temperature: the non-negotiable starting point
The target temperature for frothed milk is 140°F to 150°F. Going above 150°F scalds the milk, which destroys its natural sweetness and breaks down the protein structure that holds foam together. If you are heating milk in a microwave first, 4 oz of milk takes roughly 45–60 seconds to reach the right range. A simple instant-read thermometer removes the guesswork entirely.
Steam wand method
- Fill a metal pitcher one-third full with cold milk.
- Purge the steam wand for one second to clear any condensation.
- Submerge the wand tip just below the milk surface and tilt the pitcher slightly to one side.
- Open the steam valve fully. Position the wand tip slightly off-center to create a spinning vortex in the milk.
- Listen for the sound. The correct frothing sound is a gentle, rhythmic hiss. A loud “jet engine” noise means too much air is entering, which creates large bubbles instead of microfoam.
- Once the pitcher feels warm to the touch (around 100°F), lower the pitcher slightly so the wand tip sits deeper in the milk. This phase heats the milk without adding more air.
- Stop steaming at 140°F–150°F. Tap the pitcher on the counter and swirl to polish the foam.
The key insight for steam wand technique is that air introduction must happen while the milk is still cold. Adding air after the milk warms produces large, unstable bubbles rather than the silky texture you want.
Handheld electric frother method
- Heat milk to 140°F–150°F in a small saucepan or microwave.
- Pour into a tall, narrow cup or jar. The depth helps the frother work efficiently.
- Tilt the cup at a slight angle and place the frother head just below the milk surface.
- Run the frother for 20–30 seconds using a slow circular motion, gradually moving it upward as foam builds.
- Tap the cup on the counter and swirl to break down any large bubbles.
This method is the fastest for everyday use. The foam is stable and creamy, though it will not produce the glossy, pourable microfoam a steam wand creates.
French press method
- Heat milk to 140°F–150°F.
- Pour into the French press, filling it no more than halfway. More milk leaves no room for the foam to expand.
- Place the lid on and pump the plunger vigorously up and down for about 30 seconds. The pumping action forces air through the milk.
- Stop when the milk has roughly doubled in volume.
- Pour immediately. French press foam settles faster than steam-wand microfoam.
One French press batch works well for two drinks. If you are using oat milk, pump more gently and stop a few seconds earlier to prevent the foam from deflating.
Jar shaking and whisk methods

For the jar method, fill a jar one-third full with warm milk, seal the lid tightly, and shake hard for 30–60 seconds. The foam will be light and airy, best suited for drinks where texture matters less than convenience. For the whisk method, heat milk in a small saucepan, then tilt the pan and whisk rapidly near the surface for 60–90 seconds. Both methods are solid options for frothing milk without a machine and require nothing you do not already own.
Pro Tip: After any frothing method, tap the container firmly on the counter two or three times, then swirl in a circular motion for five seconds. Tapping and swirling breaks down large bubbles and gives the foam a uniform, glossy texture that pours cleanly.
How do you fix common milk frothing problems?
Microfoam vs. regular foam
Baristas draw a clear line between frothing and steaming. Frothing produces large bubbles, while steaming produces microfoam: uniform, tiny bubbles that look glossy and feel velvety. Only a steam wand creates true microfoam. Every other method produces regular foam, which is still excellent for cappuccinos and flavored lattes but will not support latte art pours.
Over-frothing leads to thick foam layers that sit separate from the milk below. Ideal latte foam is velvety and integrates smoothly with the coffee. Resting the foam for 30–60 seconds after frothing helps achieve this integration and improves the drink’s overall mouthfeel.
Common problems and fixes
- Foam collapses immediately: Milk was too warm before frothing started. Use colder milk and introduce air earlier in the process.
- Large, soapy bubbles: Too much air added too fast. Slow down the frothing motion and keep the frother tip closer to the milk surface.
- Milk tastes flat or slightly cooked: Temperature exceeded 150°F. Use a thermometer and stop heating earlier.
- Plant-based milk won’t hold foam: Protein content is lower than dairy milk. Froth for a shorter time and use it immediately. Barista-edition oat and soy milks are specifically formulated with added protein to improve foam stability.
- Foam too thin for cappuccino: Not enough air was introduced. For the French press or jar method, pump or shake longer and start with colder milk.
Milk protein and fat content critically influence froth stability. Whole milk gives the most forgiving results. Skim milk produces more foam volume but less creaminess. Two-percent milk sits in the middle and works well for most home drinks.
Tips for pouring frothed milk into coffee drinks
Pouring technique separates a good home drink from a great one. The way you add frothed milk changes the texture and flavor balance of the final cup.
- For lattes: Pour the liquid milk first, holding back the foam with a spoon. Once the cup is three-quarters full, spoon the foam on top. Let the foam rest for 30–60 seconds before pouring so it integrates with the liquid milk below rather than sitting as a separate layer.
- For cappuccinos: Use equal parts espresso, steamed milk, and foam. Pour the milk and foam together in one motion. The higher foam-to-milk ratio is what defines a cappuccino.
- For flavored lattes: Add any syrups to the espresso before pouring milk. This distributes flavor evenly through the drink rather than concentrating it at the bottom.
- For milk alternatives: Pour immediately after frothing. Plant-based foams deflate faster than dairy foam, so waiting even two minutes can cost you the texture you worked to create.
Pairing your frothed milk with the right coffee base makes a real difference. Exploring types of espresso drinks helps you match foam volume and texture to the drink you are actually making, rather than guessing.
Key Takeaways
The most effective way to froth milk at home is to control temperature, introduce air while the milk is cold, and match your tool to the foam texture your drink requires.
| Point | Details |
|---|---|
| Temperature control | Keep milk between 140°F and 150°F to preserve sweetness and foam stability. |
| Air introduction timing | Add air while milk is cold; warming first produces large, unstable bubbles. |
| Tool determines texture | Only steam wands produce true microfoam; other tools yield regular foam. |
| Tap and swirl after frothing | Breaking down large bubbles polishes foam into a uniform, glossy texture. |
| Match milk to method | Whole dairy milk froths most reliably; plant-based milks need shorter frothing times. |
What I’ve learned from years of frothing milk at home
The biggest mistake I see beginners make is chasing microfoam with the wrong tool. A handheld frother will never produce the same result as a steam wand, and that is fine. The foam from a handheld frother makes an excellent latte. Expecting it to behave like a steam wand sets you up for frustration.
The second misconception is that more frothing time equals better foam. The opposite is true. Over-frothing creates a thick, dry foam cap that sits on top of the drink and never integrates. The sweet spot is stopping earlier than you think you need to, then letting the foam rest.
What actually improved my results was paying attention to milk temperature and starting cold. Once I started using a thermometer and pulling the milk off heat at 148°F consistently, the foam quality became predictable. Consistency matters more than technique at the beginning. Pick one method, repeat it every day for a week, and you will learn more from that repetition than from reading any guide, including this one.
Experimenting with milk types is also worth the effort. I was surprised by how well a barista-edition oat milk performed once I shortened the frothing time. The results were not identical to whole milk, but they were genuinely good. Give yourself permission to get it wrong a few times. The milk is cheap, and the skill compounds fast.
— Stefan
The coffee that makes frothed milk worth the effort

Good frothing technique deserves an equally good coffee base. Adiracoffee roasts every bag to order in small batches in California, shipping within days of roasting so you get peak flavor in every cup. The Love Blend is built for milk-based drinks, with a smooth, balanced profile that holds up beautifully under a layer of creamy foam. For something richer, the Mushroom Coffee Dark Roast pairs exceptionally well with the velvety texture of steamed whole milk. Sourced from cooperatives in Colombia, Ethiopia, and Costa Rica, these are coffees worth frothing for. Free US shipping is available on orders over $35, and a subscription saves you 10% on every bag.
FAQ
What temperature should milk be for frothing?
The ideal range is 140°F to 150°F. Milk above 150°F scalds, which destroys its natural sweetness and breaks down foam stability.
Can you froth milk without a machine?
Yes. A French press, handheld electric frother, jar with a lid, or a whisk all produce foam without an espresso machine. Results vary by method, but all are usable for lattes and cappuccinos.
Why does my foam collapse so quickly?
Foam collapses when milk is too warm before frothing begins or when too much air is added too fast. Start with cold milk and froth more slowly to build stable, smaller bubbles.
Does milk type affect frothing results?
Whole dairy milk froths most reliably due to its fat and protein content. Plant-based milks, especially standard oat milk, deflate faster and need shorter frothing times to hold their foam.
What is the difference between microfoam and regular foam?
Microfoam consists of uniform, tiny bubbles that look glossy and feel velvety. Regular foam has larger bubbles and a lighter texture. Only a steam wand produces true microfoam suitable for latte art.